Monday, January 10, 2022

Dance Costume Sewing


Well I just finished another round of dance costume sewing and it was way more work than I anticipated!!  I remembered to allot for time to assemble the pdf patterns and cut the fabric but used up all of the budgeted sewing time sewing mock ups.  The practice versions went through 7 different sleeves (different styles and different pattern pieces drafted) and 4 different skirt/ruffle combos (length of ruffles, width of ruffles, length of skirts, drafting an asymmetric front and back from symmetric front and back pieces).  I ended up sewing two and a half mock ups.  One was a final version before the last sleeve change and after 30 minutes carefully unpicking the binding I poked a hole in the bodice and had to start the bodice/sleeve over. Approx 25 hours of time printing, assembling, drafting, sewing, unpicking. Does not include time prewashing and drying fabric, searching through patterns, researching fabrics, ordering supplies, etc.

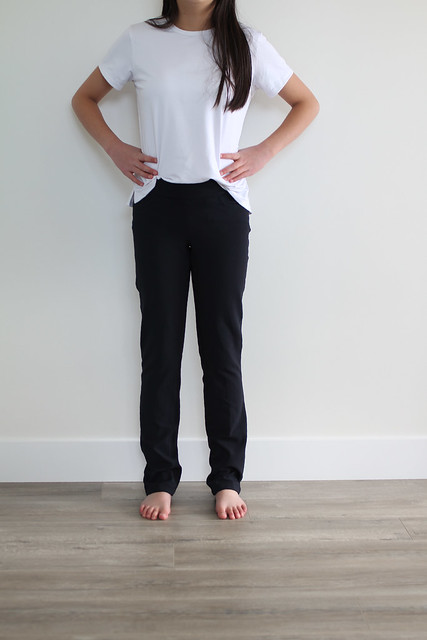
Sewing black fabric is still annoying because I can’t use my favorite and faster washable marker tracing method for the pieces and notches so it takes longer to cut everything out.

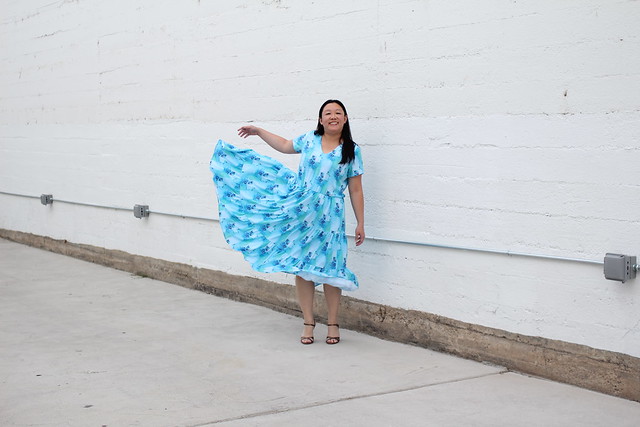
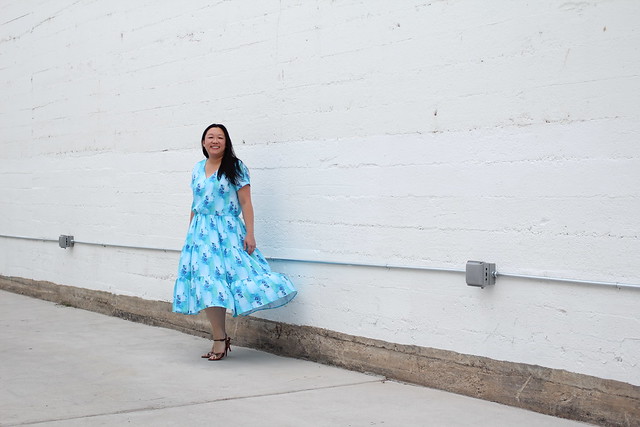
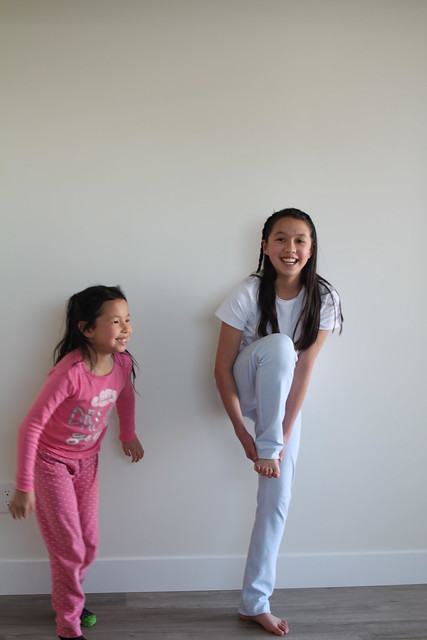
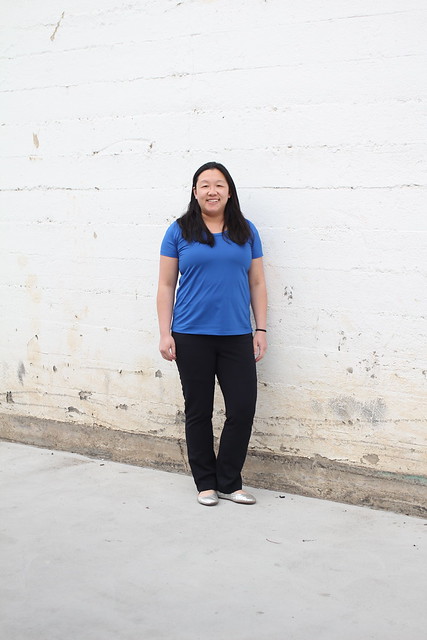
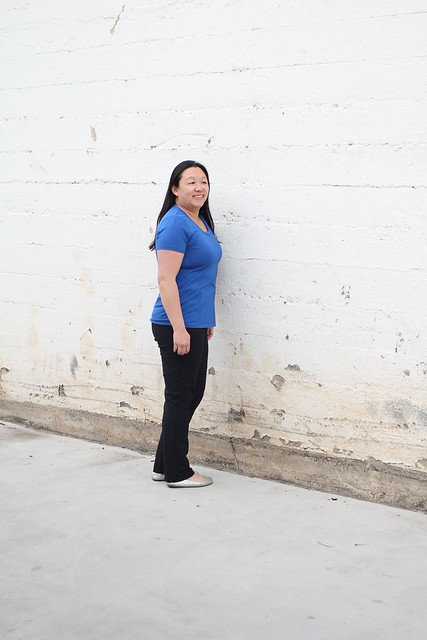
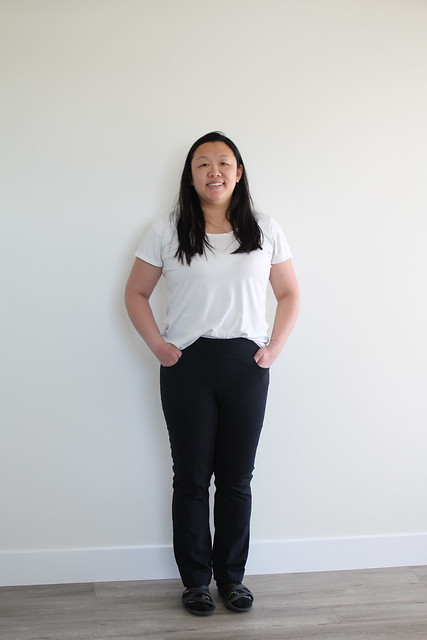
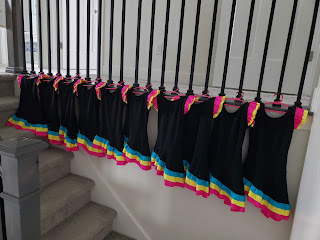
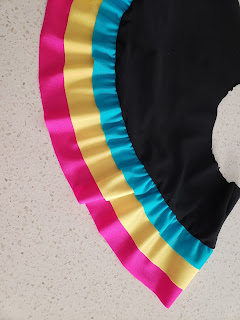
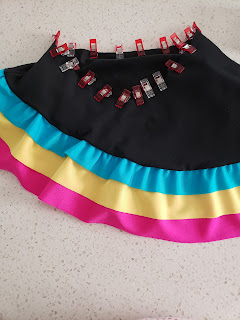
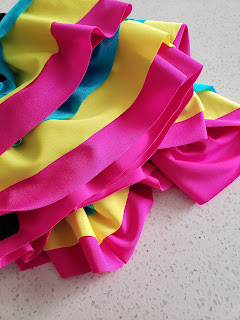
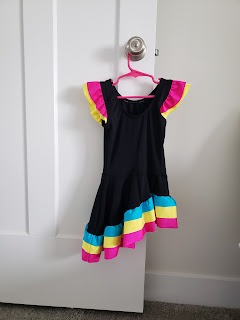
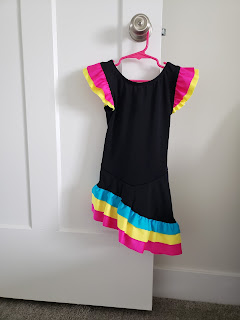
This is the Jalie Tessa with a shortened asymmetric skirt 
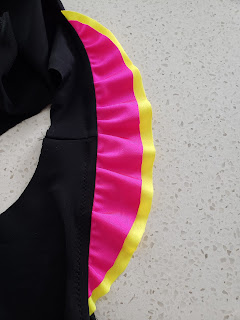
with added ruffles and double layered ruffle sleeves with bindings.

Beautiful fabrics are from Fabric Fairy!  Thank you, Megan, for custom ordering the yellow just for me!!!

10 Final Costumes

8 different sized bodices

4 different sleeves

5 different skirts

34 altered pattern pieces

30 pieces of elastic of various lengths

20 binding strips

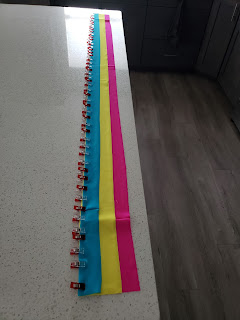
at least 140 feet of skirt ruffles gathered and sewn

about 100 sheets of paper for printing and drafting pattern pieces

approx. 55 hours of sewing/cutting/wonder clipping/basting/unpicking


Some time saving things I did were:

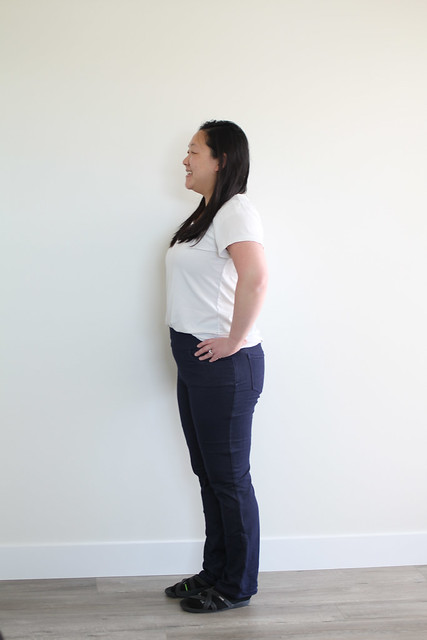
I sewed it in Lisbon’s size so I could see how it fit on a person’s body.

I only cut out single notches. 

I wonder clipped back bodice pieces together after cutting and clipped the front pieces together so I wouldn’t have to use masking tape to indicate the right side and wrong sides of the fabric.

I sewed all five size J skirts/briefs at the same time.

I cut all the ruffle strips immediately after prewashing and drying 90% on extra low.  It was faster than ironing the fabric.

I skipped understitching the binding pieces.

I skipped the optional brief lining piece.

I used the shape from the size M skirt pieces as a guide for the curve for the other skirt pieces. 

I marked the quarter markings on the elastics with washable marker and cut and sewed them for the same sizes at once.  (I cut all 10 size J leg elastics and marked them before sewing the first size J brief)

For bodices that were the same size except height I drew in half inch lines on the extension strips so it was easy to cut to the next size.

I didn’t hem the knit raw edges but I had to be very careful cutting so the edges are smooth and any markings were cut off.

I tried gathering by increasing the tension of the sewing machine but it didn’t work.


To Future Me- costume sewing is a lot more work than you think it is!!!!  The opportunity costs include not sewing fun things and missing pattern tests, an extremely messy house, and a little bit of my sanity.  I really need to raise my rates and account for mock ups since so far I’ve made significantly less than minimum wage each time I’ve sewn costumes. 

Thursday, July 8, 2021

Raspberry Creek Fabrics Favorite Things Tour 2021

Hello! 

I am loving all of the inspiration on the annual Raspberry Creek Fabrics Favorite Things Tour!! Be sure to check out the Raspberry Creek Fabric Facebook page to enter the daily giveaways for fabric (of course!) and the bloggers' favorite notions. You can also check out this week's posts on each blogger's sites: Made By Kates Kainara Stitches I Sew Best After Midnight Sew Mary Mac Tessa Does for Love Notions Sew Love You All My Spare Time Pins and Pinot Crafty Professor Sew Hard of Hearing Sew Sophie Lynn Genwin Design Co. Shwin Designs That's Sew Kari 

I am so excited about the new custom printing options coming soon! I need to figure out how to tile images because it would be so fun to design fabrics! Through the website you'll be able to pick from a library of past designs and pick which fabric type you'd like the design printed on, which opens up so many possibilities!!! 

Every season I crush hard on a print/collection only printed on double brushed poly fabric, which I can't wear because of my sensitive skin. The custom print option allowed me to pick one of the fabrics from the Painterly by Theresa Namenye collection from the Summer 2020 release and use the rayon challis base. It has probably surprised exactly none of you that I picked this colorway! I was a little wary of the rayon challis base because I've tried a handful of rayon challis from other shops and sometimes it has a mind of its own and it grows and is shifty and fussy but some of my sewing friends assured me the Raspberry Creek Fabrics rayon is easier to handle. I'm happy to report that it wasn't the nightmare that other fabrics have been in the past! I did still cradle the fabric like a baby in my arms when switching between the iron and sewing machine and I made sure not to let the fabric hang off the tiny folding table when sewing. There was a little bit of warping in the super long tiers but the drape and gathers covered that up pretty well. I did not feel like I needed to cut the fabric pieces singly (vs on the fold) because the pieces were small enough and the fabric was not too shifty. I didn't experience much fraying at all either, which was super nice when I was spending hours gathering the fabric. I opted to finish the pocket edges the old school way (with a zigzag on my regular sewing machine) because my serger likes to curl the edges of fabrics even after lowering the tension. The best part of this fabric is how it feels to wear!! I may or may not have spent days twirling and frolicing and skipping around my house in this dress. The swish! The twirl! The drape! It feels cool and comfortable to wear; it was nearly 100F when we took these pictures! Hey June Lucerne Dress in RCF rayon by replicate then deviate Hey June Lucerne Dress in RCF rayon by replicate then deviate 

I chose to use the Lucerne Dress hack that Indu shared. Teri also sewed a Lucerne Dress and I read and reread both posts and then made it my own and did what I could to maximize my fabric. [I should've read Adrianna's post too and tapered the sides in but my dress still turned out okay!] I reprinted the (aff link) Lucerne Blouse pattern (since I'm a different size than I was when I first sewed the blouse). I was between sizes and chose to size up because I was planning a pullover dress (ie no zippers or snaps or buttons or laces etc). I knew I'd be more comfortable raising the v neck so I raised the bottom of the v by about 1.25 inches. I also adjusted the front facing pattern piece to match the less deep v. I cut the fabric at approximate waist level (determined by holding the paper pattern pieces up to my body). 

I omitted the ties on the sleeves because I didn't have enough fabric. I also really love the ties in the summer and hot weather but don't love how they feel in the winter when I have to wear a sweater or jacket over them.     Hey June Lucerne Dress in RCF rayon by replicate then deviate Hey June Lucerne Dress in RCF rayon by replicate then deviate 

 And of course I added pockets! I wanted a pocket piece that anchored in the waist seam so that the pockets wouldn't flap around. I found a free pattern piece by Thread magazine and used the instructions from Seamwork to sew them since I don't own that issue of the magazine. I must've been really tired when I first read the instructions because they made no sense. But going through the steps they worked out beautifully and I will definitely consider pockets like this again!

Finally the tiers and hours of gathering! I used one of my favorite notions, Crayola washable markers, to mark the center of each tier after cutting and side seams for the bottom tier. I love how markers show up on fabric and don't brush off like chalk. They have also improved my accuracy in tracing and lining up notches etc. 

I basted the hem (another shortcut since it's far faster to baste the hem vs measuring every few inches while pressing the hem), pressed, and hemmed the bottom tier before assembling the skirt portion. Having the hem done made it feel like the dress was finished faster since hemming is often the last step in the process. I also liked hemming first because the fabric wasn't weighty or falling off my tiny table as much. My tiers ended up being about 10.5 inches in height (with a 3/8 inch seam allowance on the top and bottom) and approximately 1.5 times wider than the previous tier. The second tier is actually just two width of fabric pieces and the bottom tier is three width of fabric strips. 

I remembered that Teri slightly curved the sides of her bodice and I did with my fabric also. However when I tried the dress on after attaching the skirt I felt like there was too much ease in the waist. I decided to add some elastic to the waist seam and after three tries I got the tightness just right. I wanted it to gently hug/support the weight of the skirt but not be too tight. I used (affiliate link) this elastic (except 3/8th inch wide instead of 1/4 inch. The 3/8 in is out of stock atm) and it feels wonderful and is the type of elastic I use the most (for necklines, underwear, leos, swim, etc), hence why I bought an entire box of it. I marked the quarters and eighths on my elastic loop itself and I'd already marked the center front and center back of the bodice with washable marker. I used wonder clips to line up the elastic markings and bodice markings, stretching the elastic gently and sewed with a large zigzag. Hey June Lucerne Dress in RCF rayon by replicate then deviate Hey June Lucerne Dress in RCF rayon by replicate then deviate 

I really love this dress! It's totally my signature style! And while I do need a break from gathering I am already scheming up different renditions! 

Thanks for stopping by! Happy sewing!!

Wednesday, April 14, 2021

Jalie Eleonore in Different Fabrics

Jalie Eleonore by replicate then deviate 

    We are excited to share all about the seven pairs of Jalie Eleonores I've sewn in the last few months! Ansley has had a few growth spurts and was in desperate need of pants and I'm missing my old gym and have been struggling on and off with dizziness and allergies, which makes exercising pretty impossible plus the stress from the pandemic.... Anyway, we are thrilled to have super comfortable and super cute pants that fit! 

    The Jalie Eleonore pants come in 27 sizes and are drafted for denim or twill with at least 20% stretch across grain. The Eleonore is a pull on pants pattern with a faux fly and back pockets. There is an add on available with pattern pieces and instructions to add french seamed front pockets too. The leg is more of a straight shape but there are instructions to turn the leg pieces into a skinny jean silhouette also. There is a capri cut line and a full length leg pattern piece. The sewing was pretty straightforward, since I have sewn true jeans and other pants before. The faux fly is definitely faster than a zipper and I really don't miss the zipper at all. I like to print the instruction pages because I don't sew near a computer and I almost always print multiple instruction pages per one sheet of paper. I missed some of the topstitching that is in the diagram on my first pair (the pink ones) and chose to omit some of the topstitching in other pairs to change how they look. 

    I sewed Ansley's one size up from her hip measurements since she's growing and hopefully these will still fit after the hot summer is over. (The pattern recommends choosing your size based on hip measurements). I thought I might need to shorten the legs but had her try on the first pair and they are the perfect length! I used a stretch denim (I believe it was called "hi stretch" denim) from Joann a few years ago. The denim has approximately 30% cross grain stretch and zero vertical stretch. Although I did buy all of the available fabric, I wish I had bolts and bolts of it. This pair fits her the best and we had fun designing the back pocket. She picked the subject and then googled images (I think she used the search term "simple BB-8" which was a great idea!). We rescaled the image to fit as we wanted on the pocket piece and I traced the outline in soap and stitched. Tbh I did a practice one and it did not turn out well. Fortunately I had enough fabric scraps to recut one pocket piece. Jalie Eleonore by replicate then deviate Jalie Eleonore by replicate then deviate Jalie Eleonore by replicate then deviate Jalie Eleonore by replicate then deviate Jalie Eleonore by replicate then deviate 

    Her second pair (technically third sewn but second in the pics) is sewn in this ponte from Raspberry Creek Fabrics. It has about 60% stretch cross grain and a little bit of vertical stretch. The ponte is a bit heavier (14-15 oz) than the denim, which I think is why it ended up a bit longer in length than the denim ones. Since it's a knit I only turned the raw edge under once so it looks like a wide cuff. I used an upcycled woven bedsheet for the pocket bags. I serged all the raw edges where the pockets are attached and serged the back yoke pieces before topstitching. My serger has four different colors in it still because I think the stitches look so pretty. If you get super close the back yoke you can see some of the serger threads so that's why I skipped the serging for the seams that are only the ponte since it's a sturdy knit that doesn't fray. I eliminated the faux fly to see how it looked and it looks okay but I decided I wanted the faux fly detail on mine after seeing how it looked on hers. :) Ansley loves this pair and says they are so comfortable!! Jalie Eleonore by replicate then deviate Jalie Eleonore by replicate then deviate Jalie Eleonore by replicate then deviate Jalie Eleonore by replicate then deviate Jalie Eleonore by replicate then deviate Jalie Eleonore by replicate then deviate Jalie Eleonore by replicate then deviate 

    The final pair is sewn in Carbon Black Ponte Tricot Knit from Fabric Fairy. I used this fabric before for a pair of Sabrina Slims and love the thickness, ease of sewing, and how it feels when I wear it. This fabric has a sturdier weight (14 oz), excellent recovery, and is wicking, which is amazing. It has approximately 25% horizontal stretch and 45% vertical stretch. I was really excited the fabric is still available because it makes a perfect pair of pants! We wanted a more dressy feel so we opted to eliminate the back pockets and faux fly. I used scraps from Ansley's mask to make fun pocket bags, not that anyone will ever see both at the same time haha. I remembered to switch to my walking foot when sewing the pocket bag facings (a knit) to the (woven) pocket bags and it was much easier to keep all the pieces lined up. I also used my walking foot for all the seams involving the pocket bags. Again, I opted to only turn the hem under once since the fabric is a non fraying knit. I left the hem a bit longer since she's growing. Jalie Eleonore by replicate then deviate Jalie Eleonore by replicate then deviate Jalie Eleonore by replicate then deviate Jalie Eleonore by replicate then deviate 


 Side by side pics:

  Jalie Eleonore by replicate then deviate Jalie Eleonore by replicate then deviate 


    I happened to catch a preorder for Faux Denim Knit from Zenith and Quasar and was excited to try the Eleonores in this fabric! This is the second pair I sewed but in the collages I decided it would be easier to separate the dark fabrics. My hips are between sizes so I sewed the size up, as recommended by the pattern instructions. I baste fitted my first pair even though the 3/8 inch seam allowance didn't leave too much room for letting anything out. I tapered out to a 3/16th seam allowance for my calves in my first pair (the pink ones) but eyeballed that amount in the calves for subsequent pairs when cutting. I also decided to add about 3/4 inch in height to the waistband because it felt a touch too low cut for me. (I added about 1.5 inches to the waistband pattern pieces which are folded in half before being sewn to the pants). My waist is usually 2 sizes larger than my hips so I wasn't sure how the waistbands would fit on my body. I cut my straight hip size (didn't grade) and used a soft elastic (it's literally called "soft elastic" lol and they fit really comfortably!!!!!! This pair was also the first pair I sewed in a knit. I did interface the back of the pocket before carefully stitching the Black Swan symbol from our favorite book series, Keeper of the Lost Cities by Shannon Messenger, on the pocket. The purple thread I used is closer to the fabric color than I expected but I still love it. I debated whether or not I needed interfacing anywhere else in the pants but the knit fabric was sturdy enough that I didn't need it in the faux fly. It hasn't been a problem at the corners of the back pockets but that is something to consider for future pairs. This fabric is the thinnest of the fabrics I've used. It has four way stretch and medium to good recovery. It's totally the ulimate in comfort and my favorite pair!! Jalie Eleonore by replicate then deviate Jalie Eleonore by replicate then deviate Jalie Eleonore by replicate then deviate Jalie Eleonore by replicate then deviate Jalie Eleonore by replicate then deviate Jalie Eleonore by replicate then deviate 


    This pretty pink stretch twill is from Simply by Ti a few years ago. It is probably the fabric that closest meets the suggested fabric requirements. It was easy to sew and it's easy to wear though it's definitely the snuggest on my stomach, even with the soft elastic waistband. I love the happy color and it goes with quite a few pieces in my wardrobe! I sewed these first and sewed them as is (except for slightly grading out for my calves as described above). When I was baste fitting I also discovered I needed to shorten a little above the knee and below the knee. Luckily the legs are pretty straight so I adjusted my paper pattern piece and traced onto the fabric pieces. I think I ended up trimming very little off the fabric pieces themselves but I was really glad I took the time to baste fit before stitching and serging the side seams. Jalie Eleonore by replicate then deviate Jalie Eleonore by replicate then deviate Jalie Eleonore by replicate then deviate Jalie Eleonore by replicate then deviate Jalie Eleonore by replicate then deviate 


    One of the coolest things about the Eleonores is how little fabric they require when the fabric is a wider width (like 52 inches). I was able to cut a pair of Eleonores for both of us with just under 3 yards of fabric! I have sewn button up long sleeved shirts that needed about 3 yards of fabric (albeit narrower width fabrics). It's kind of baffling and awesome for pants sewing. After sewing Ansley's ponte pants with fabric from Raspberry Creek Fabrics I made sure to make a pair for myself. I decided to use the faux fly for mine since it added a bit more detail and I did some single topstitching on mine that I didn't on hers. I polled my instagram followers to find out if there were any contraindications to using a knit fabric for the pocket bags (in addition to the knit pocket bag facings) and got some helpful comments like make sure the stretch is greater horizontally than vertically, which I did. I found a scrap of thin jersey knit and it worked wonderfully! It also meant that I totally skipped all the serging in the entire pair so it went together super quickly! I ran out of soft elastic so I used 3/4 inch non roll elastic and it feels just as comfy as the soft elastic. Once I tried my pair on, I understood why Ansley was so excited about her pair- another super comfy secret pajamas pair of pants! Jalie Eleonore by replicate then deviate Jalie Eleonore by replicate then deviate Jalie Eleonore by replicate then deviate Jalie Eleonore by replicate then deviate Jalie Eleonore by replicate then deviate 


    The final pair I'm sharing today is also sewn with the Carbon Black Ponte Tricot Knit from Fabric Fairy. Thanks to Karen Gregoire in the Jalie Sewing Group on Facebook I kept the back yokes, omitted the back pockets, and omitted the faux fly to make this pair a bit dressier and less jean like. (side note- before I knew anything about sewing I had a convo with a former coworker about a pair of pants that I was wearing in the eye clinic. She argued they were jeans and now I can see where she was coming from since they were kind of jeans styled with back pockets and a zippered fly. However they definitely weren't denim (which is what jeans were in my 20 something year old brain) and she conceded they weren't officially jeans because they didn't have rivets. lol) I also decided to add a blind hem to make them even fancier! I always use this excellent tutorial from Melly Sews and get perfect blind hems every time! Jalie Eleonore by replicate then deviate Jalie Eleonore by replicate then deviate Jalie Eleonore by replicate then deviate Jalie Eleonore by replicate then deviate Jalie Eleonore by replicate then deviate Jalie Eleonore by replicate then deviate Jalie Eleonore by replicate then deviate Jalie Eleonore by replicate then deviate 

Side by sides:

  Jalie Eleonore by replicate then deviate Jalie Eleonore by replicate then deviate Jalie Eleonore by replicate then deviate 

    Thanks for checking out our very lengthy post! The Eleonore is a wonderful pattern and we love being able to create different looks with different fabrics. I can see myself sewing more pairs as my daughter grows and maybe for her little sister too, who was feeling left out. I also prewashed a Cone Mills stretch denim from LA Finch Fabrics but then we had a random 80F weekend and I decided to wait until fall to sew those. It was surprisingly difficult to take pics in the exact same spot at exactly the same angles. I had marked the spot on the floor with a piece of masking tape but didn't like that it showed depending on how we were standing haha. I also kept my back against the opposite wall (these are taken in our front entry hallway) but it was still a challenge to get the exact same pic. And I didn't adjust the exposure perfectly for each set of pics but it was still a really fun experiment!