Thursday, March 31, 2011

Lollie's Brownies

the best brownies ever! Recipe from the Ekenes Family. :) I can't stop making (and eating) these. (yes, that is the smallest brownie ever and yes, it's from the third or fourth batch of brownies I've made since taking the "how-to" photos).

Photobucket

In a saucepan, melt 1 1/2 cubes butter (1 1/2 sticks or 3/4 cup butter) with 3/4 cup of cocoa on low heat, stirring frequently. Cool, if necessary.

Photobucket

In a separate bowl, beat 4 eggs and 2 cups of sugar.

Photobucket

Add cocoa mixture.

Photobucket

Add 1/4 tsp salt, 1 tsp vanilla, and a little less than 1 cup of flour.

Photobucket

Spread in a pan.

Photobucket

Bake at 350F for 30 minutes.

Photobucket

Let cool a bit and enjoy! Make them every four or five days like me. Or you can turn it into trifle.

Wednesday, March 30, 2011

Porcupine Meatballs

Photobucket

Photobucket

Don't worry, they aren't really made out of porcupines. That would be gross.

What you need:
a pound of 93/7 lean hamburger, thawed
between 1/2 to 2/3 cup of white rice, uncooked
salt and pepper
worchestershire sauce
medium can of tomato sauce (about 14 or 16 oz; not the teeny 6 or 8 oz ones or the large 29 ish oz ones)
minced onions (optional)
garlic powder (optional)

In a large bowl, add the rice, salt and pepper, minced onions, garlic powder, and a very generous dash of worchestershire sauce. Add the hamburger. Mix well (it's really (and slightly gross) easy to mix evenly if you use your (clean) hands. Form into 12 meatballs. Wash your hands well. Pour the can of tomato sauce over the meatballs. Cover pan with foil and bake at 325 for an hour or so, until hamburger is done and the rice is soft. Serve with rice or alone.

Thursday, March 24, 2011

Picnik Fun

Photobucket

Want to make one?

Select the "Create" tab.
Select "effects."
Under "effects" select "pencil sketch."
Play around with the radius, strength, and fade. My radius is about 2.5 (mm? the units aren't specified), strength is about 90%, and the fade is about 15%. I don't pay for Picnik premium so these are best guesses.

Tuesday, March 22, 2011

Pleated Apron

for a friend's bridal shower next week.

Photobucket

I used Jess's tutorial. It's so pretty I might have to make one for myself! I love that it's fully lined (so I don't have to cry that my pinking shears method is not that awesome/I can still sew for other people without a serger) and the pleats are so pretty. The only thing I would change is to use less interfacing in the ties, as they're kind of stiff. My friend is smaller than me, so she'll be able to tie the ties in a bow or knot them. I'm scheming a way to use the leftover fabric and more polka dotted pleats for a skirt (or dress?) for Ansley. . . .

Monday, March 21, 2011

Green Skirts and Ansley Pictures

I made Becca a St Patrick's Day skirt. I love the invisible hem and how full it is.

Photobucket

I had almost enough left to make one for myself (after her skirt and Ansley's corduroy dress). I added pockets! The shape isn't perfect but they're functional.

Photobucket

And here's a little more picasa fun.

Photobucket

Wednesday, March 16, 2011

The Double Double Bubble Bubble Skirt

Photobucket

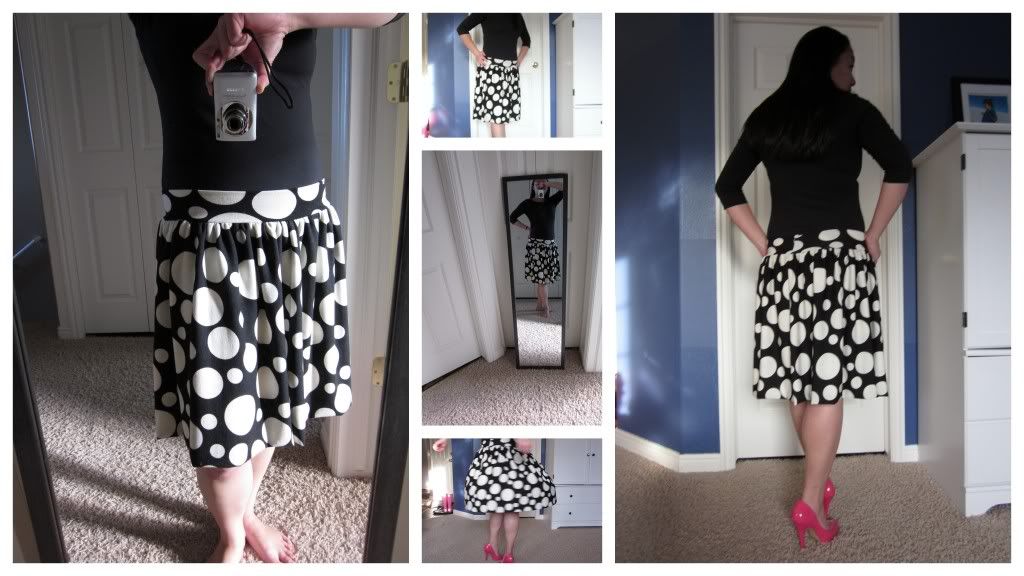
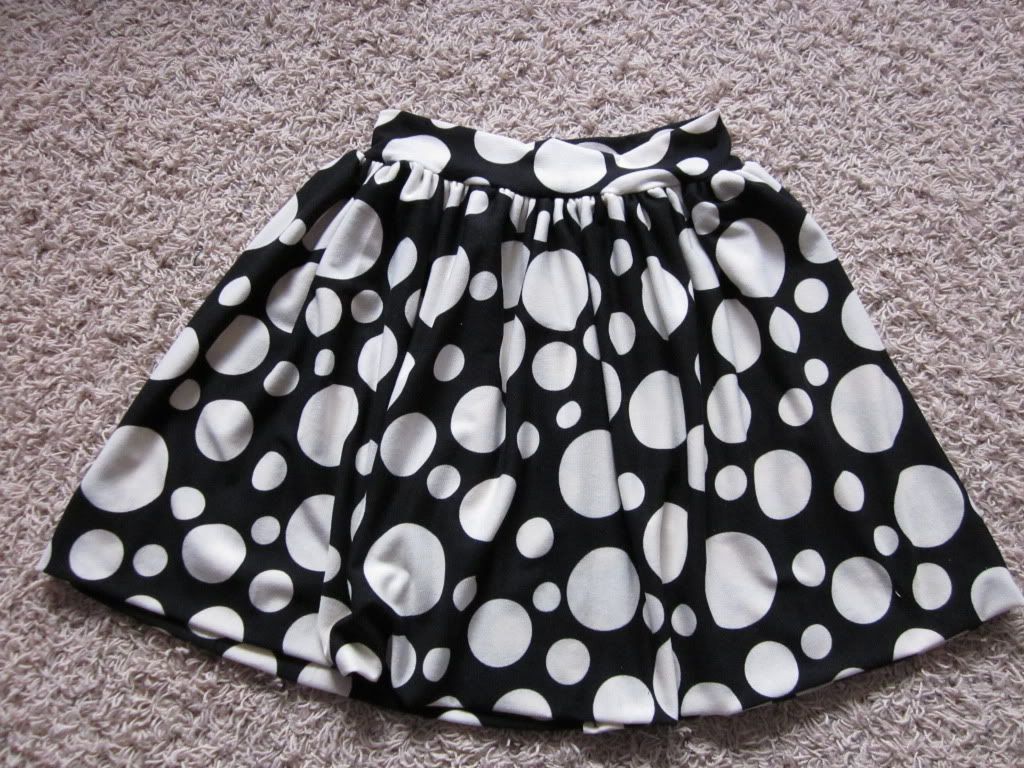
My birthday skirt! The large polka dots remind me of bubbles and the skirt is a bubble skirt.

Here's how I made it.

1. Find some knit and prewash it. I used about 2 1/2 yards but there was some leftover. I got mine at Joann's for 75% off. Luckily there was enough on the bolt to make two b/c I didn't choose the best way to make this skirt the first time around. I blame it on being woken up five or six times by a sick little girl. It makes for a great skirt name though. Anyway.

2. Figure out how wide you want your waist band to be. I stretched the knit around my waist until it felt comfortably snug. (make sure the stretchy part of the knit is being stretched around your waist). Decide on the height and double it plus an inch or so. (it will be folded over). My waist band is a little shorter than I would've liked but I was out of fabric. You should now have a rectangle.

3. Decide on your skirt length and double it plus a little extra for seam allowances. To determine my skirt width, I wrapped the fabric around myself twice and cut it. You should now have a large rectangle.

4. Wrong sides together, fold your skirt piece in half long ways. At the open ends (not the fold), sew a long straight stitch with the longest setting. Do not backstitch. You can sew another long stitch, if you're worried about the first one breaking.

Photobucket

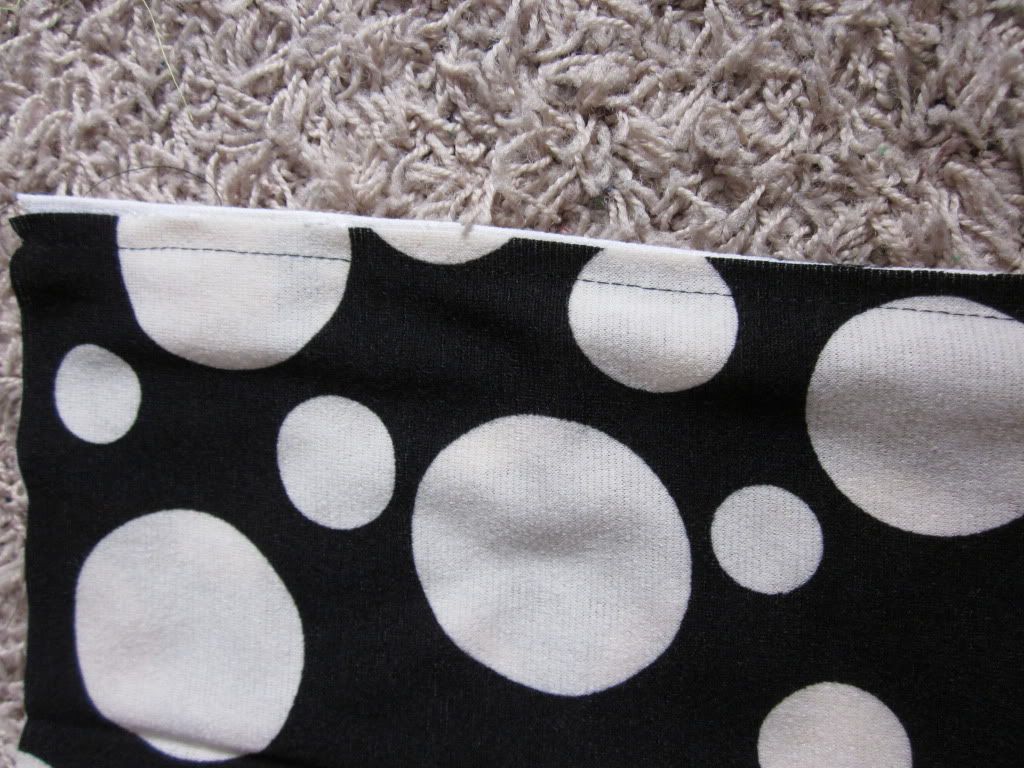
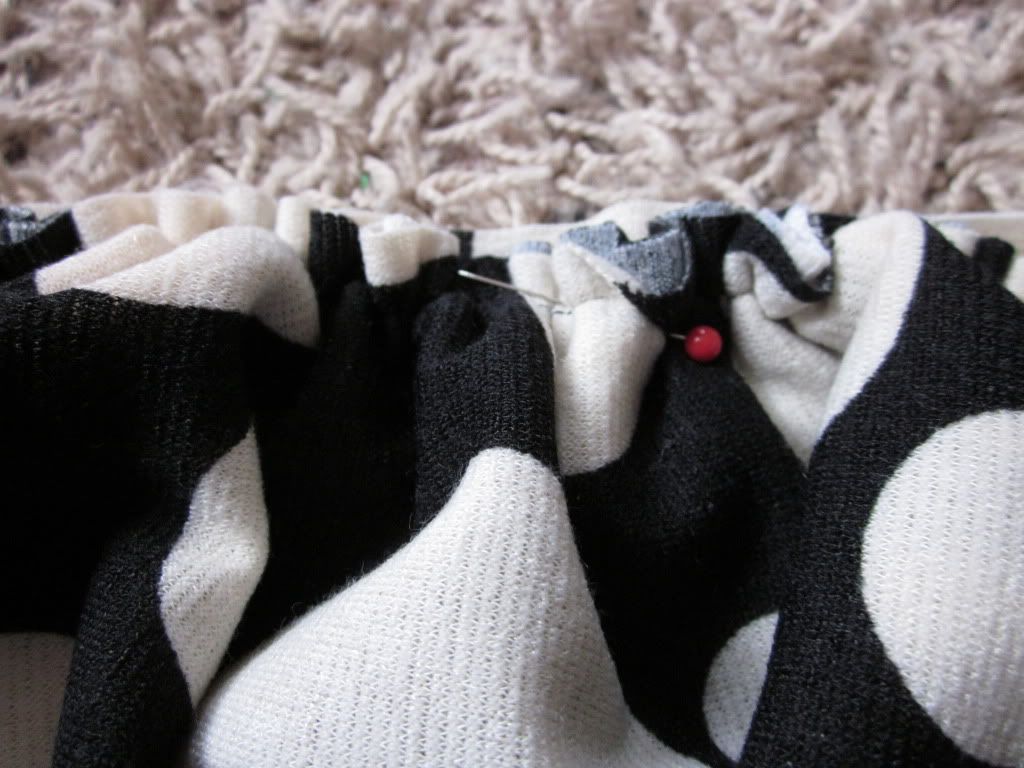
5. Holding onto the bobbin thread, scrunch (or gather) your fabric together.

6. Fold your waistband in half, longways, with wrong sides together and free ends up. (ie the fold is down)

7. Adjust the gathers on your skirt piece so it lines up with your waistband.

Photobucket

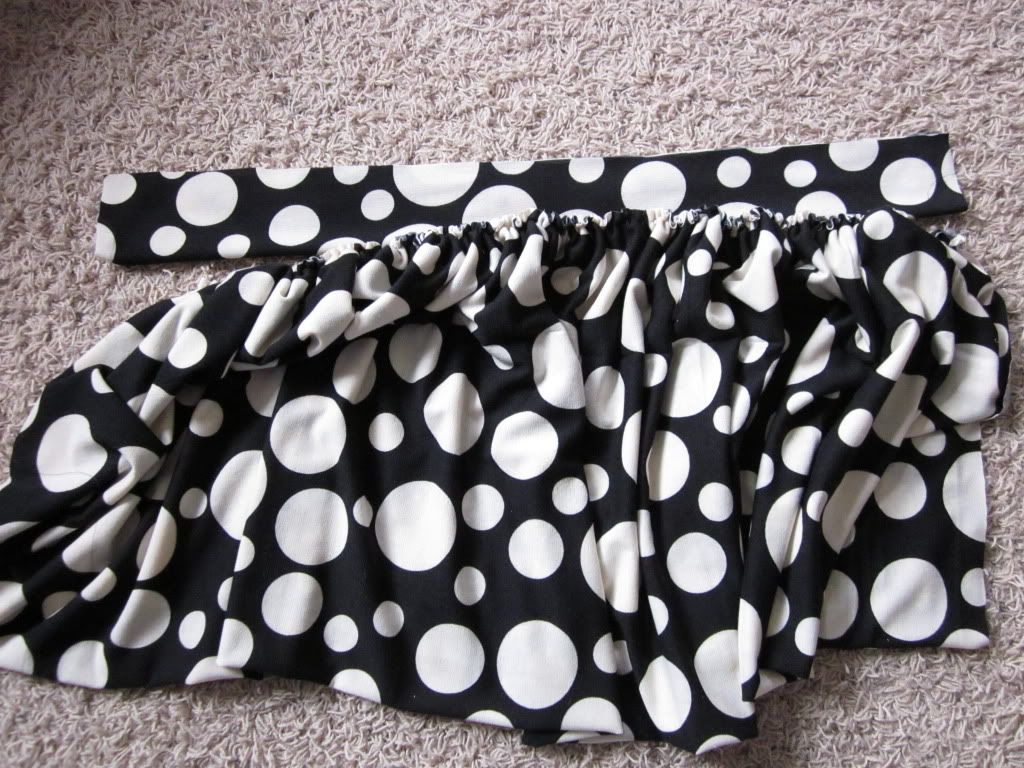
8. Pin your skirt to the waistband piece at the free end of the waistband (not the fold)

Photobucket

9. Sew in place with a zigzag stitch.

10. You can remove your basting stitches from step four if you want. I was lazy and left mine in.

11. Pin the skirt together, right sides together, lining up the bottom of the skirt and the waistband. Sew in place with a zigzag stitch.

Photobucket

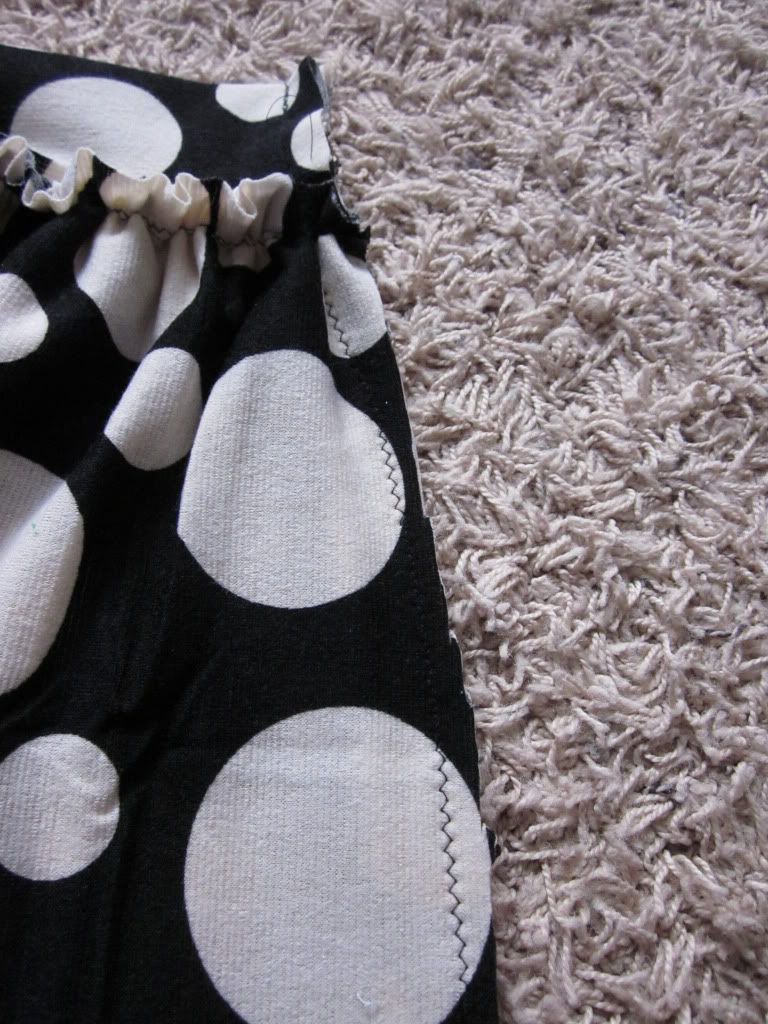
12. Trim any excess fabric near your seams if you have any. Show off your new skirt!

Photobucket


Linked here:

Monday, March 14, 2011

Happy Pi Day!

I made these yesterday to start our Pi Day celebration early and b/c it's a million times easier to cook when Tyrone is home to entertain Ansley.

Photobucket

Recipe courtesy of Oprah.com

Filling:
1 Tbsp. olive oil
1 Tbsp. unsalted butter
1 medium Onion , chopped
1/4 cup flour
2 cups chicken stock
2 cups chopped Roasted Chicken (I used boiled chicken)
1/2 cup frozen sweet petite peas
1 potato , diced and boiled (I used a few small yellow potatoes)
1 1/2 cup chopped, cooked carrots
1/2 tsp. salt
Cracked pepper
Dash of Tabasco® sauce (I did not use this)

Crust:
3/4 cup white or yellow cornmeal
3/4 cup flour
1 Tbsp. baking powder
1 1/2 Tbsp. sugar
1/2 tsp. salt
3/4 cup milk
1 large egg
2 Tbsp. canola oil

To make filling: Preheat the oven to 400°. Spray a 2-quart casserole with cooking spray. In a large sauce pan, heat olive oil and unsalted butter together. Add onion and sauté until tender, about 4 or 5 minutes. Add in flour until blended. Slowly stir in 2 cups of heated chicken stock, whisking well. Cook mixture over medium heat until thickened and bubbly, about 4 minutes. Stir in chicken, peas, potato, carrots, salt, pepper and Tabasco®. Pour into a 2-quart casserole dish coated with cooking spray and cook until heated and thickened. Spread evently into an ovenproof dish.

To make crust: In a bowl, stir cornmeal, flour, baking powder, sugar and salt. Stir milk, egg and canola oil until well combined. Stir wet ingredients into dry ingredients. Spoon the batter evenly on the filling. Bake until the top is golden brown, about 22 to 25 minutes.


I also made these a few weeks ago. I didn't like them as much as the Oprah Chicken Pot Pies, but the bacon was a nice addition.

Photobucket

Thursday, March 10, 2011

Ansley's Favorite Book Brought to Life

Photobucket

I've been enjoying the Once Upon a Thread series at one of my favorite blogs, No Big Dill.

I went to Joann's the other day to find some green fabric for an upcoming project (well, it's actually done but the recipient hasn't seen it yet) and found this perfect green corduroy. Joann's is moving to a bigger location (closer to my house) and everything in the store is marked down. All of the fabric was being sold by the bolt so I had enough to make Ansley a little dress. (and possibly enough to make something else for me. . . .)

The inverted pleat wasn't part of my original plan (I cut up the fabric while Ansley was sleeping) but it's cute over her belly and I like how it turned out. I'm also pretty excited about the topstitching on the straps. I also really like the gathers in the back. And in case you're curious, I didn't make any buttonholes; the buttons are sewed directly on to the straps.

I did take a few pictures of the creation process, which I'll post if any one is interested. :)

Check out more inspiring creations here:


Tuesday, March 8, 2011

Another New Favorite Skirt

Photobucket

Just like this one except the front and back weren't completely symmetrical so I'm wearing it the "correct" way. The brown skirt went back to its original owners. I love how flouncy the ruffles are. Hooray for free skirts.

Linked here:


and here:

Fashion Style Etiquette Cardigan Empire

Saturday, March 5, 2011

Another Day, Another Dollar, Another Dress

Photobucket

Another day of being sick (and another night of Ansley not sleeping)/me going crazy with the unnecessary crying b/c I won't let her watch Curious George all day long.

One of the dollar dresses I bought at Walmart (yes, only a dollar!) with plans to repurpose them. I know the before picture isn't the exact dress but it's the same style, weight, etc. The one I used was a size 16 in women's.

My favorite pattern as of late. Also seen here and here. It's obviously a bit big in the arms and length but I want it to fit her for a while and I didn't measure the length on her b/c she was napping for a few minutes. The fabric is actually two layers. It would've been really thin if it wasn't. I'm not sure it'll last that long if it gets snagged on anything but it sure is comfy, lightweight, and airy- perfect for summer.

Friday, March 4, 2011

It's Spring Training Season

so spring must be coming!

Photobucket

I made this little pillowcase for my as seen on tv sobakawa pillow (which works alright but I think the foam beads are deflating. It's also kind of small- definitely too small to share with Ansley. Maybe I need to make a buckwheat pillow like my college roommate had. . . .) I used ideas from this tutorial, namely which way to fold the fabric, to make a border piece, and topstitching. My border piece was a bit wide b/c I wanted to use the leftovers from this blanket for the main body of the pillowcase. Doesn't Ansley look so little?

Thursday, March 3, 2011

Skirt Refashion

Photobucket

I got this knit skirt from my piano students' mom. I cut it at my knee length. I divided the bottom part of the skirt into thirds and cut them, trimming the seams around the back slit (for "walking"- guess I take really large steps!) and the bottom hem. I sewed all of the pieces into one long strip, basted the top and gathered. After debating whether to sew it on the outside or the inside of the skirt, I sewed it on the outside with a zig zag stitch. The final step was rotating it (it was pretty much the same in the front and back) so the original back seam isn't directly in the middle of the back. I don't need any attention there. ha.

Love the collage? I just learned how via this awesome blog.

Wednesday, March 2, 2011

I Want This Outfit.


The end. Found here.

Trifle

Photobucket

I learned this recipe at a Pampered Chef Party. So good!

Layer brownies. (I used one of my college roommates/best friend, Becca's Lollie's brownies recipe. I'll share it once I find out if it's not secret. I'm a snob and don't like boxed brownies).

Photobucket

Top with a layer of pudding. (large box of pudding, about 2 1/2 cups of milk and about 1 cup whipping cream well beaten and chilled for five minutes or so. A lower fat alternative would be just pudding and about 3 cups of milk).

Photobucket

Top with Heath toffee bits. (found in the baking aisle near the chocolate chips and such).

Photobucket

Repeat.

Serve immediately or chill in the refrigerator. It still tastes amazing the next day but the toffee bits will absorb moisture from the pudding layer and become less crunchy.

Variations:

pudding- the first time I made this I used vanilla pudding. I think I prefer it. It would also be good with banana pudding like my brother's favorite dessert at CPK.

toppings- fruit like strawberries, blueberries, and raspberries would be yummy. It'd probably be great with mini chocolate chips and/or peanut butter chips too.

add a layer of whipped cream

make a little version- b/c little things are so cute!

Photobucket

Giveaway winner announced here.