Friday, December 6, 2019

Sew Family Jammies Tour

Hi friends!

I have loved watching Mac sew family pajamas for her family over the last few years and was excited when she and Katie opened it up for anyone who wanted to sew pajamas! Get your free ticket here (so you can get discount codes and be eligible for prizes)! And read all about Sew Family Jammies with Sew Altered Style (Mac and Katie) and Maker Mountain Fabrics (Grace) and Blog Tour Coordinator Extraordinaire (Teri aka FaSewLa) here.


Sew Family Pajamas by replicate then deviate


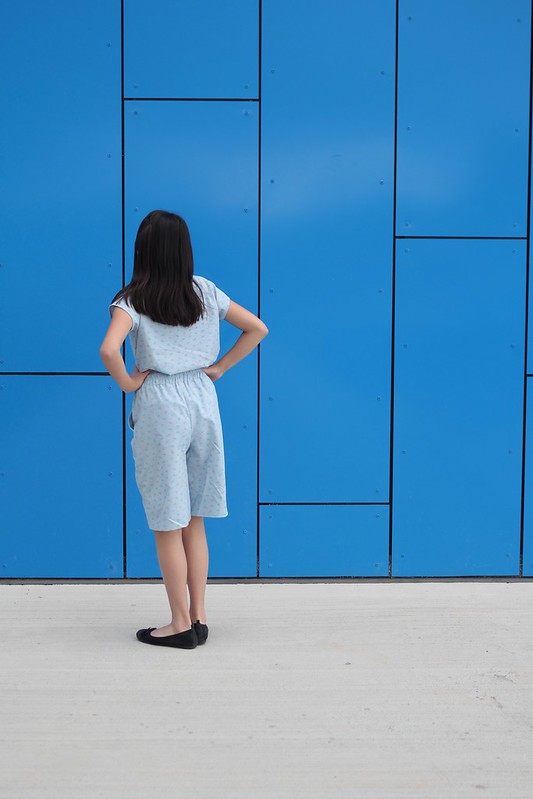
Today I am sharing matching sister jammies featuring Lisbon's favorite animal. If you've been following her for the last five years this comes as no surprise. This wonderful fabric was graciously gifted by Raspberry Creek Fabrics. Thank you Diana, Brittney, and team for literally making Lisbon's dreams come true (she used to dream about snuggling baby penguins every night) and getting my package here so quickly!

Sew Family Pajamas by replicate then deviate

Sew Family Pajamas by replicate then deviate

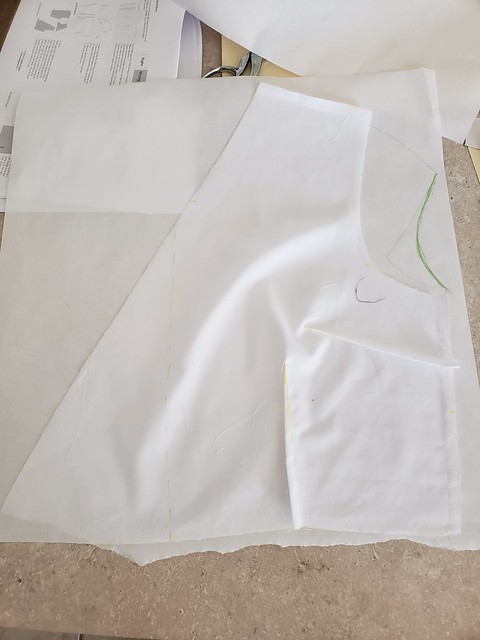
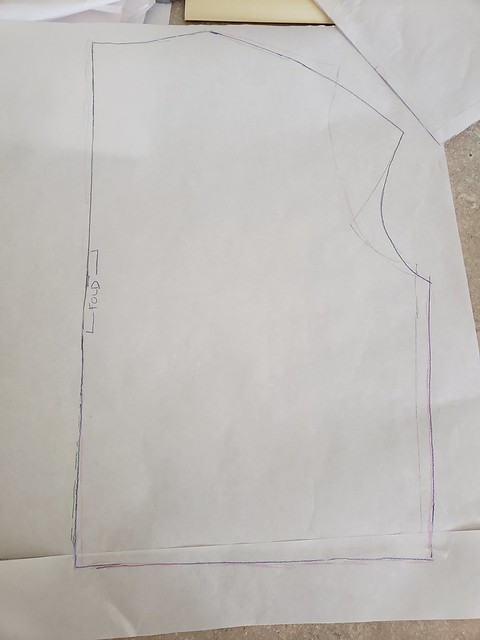
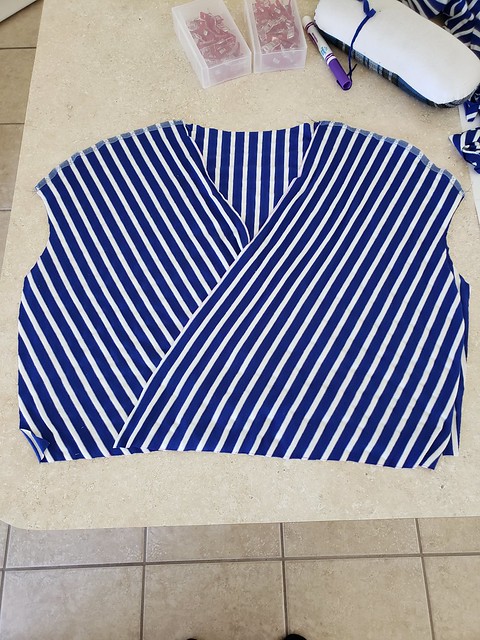
The fabric I used is the cotton lycra CLUB Black on Heathered Grey Geometric Penguins designed by Brittney Laidlaw. This was my first time sewing the grey base and it was so easy because my ball point needle sewed without skipping stitches (unlike my black pants later in this post) and the fabric can hold a press. I used the Hey June Camden Raglan for the tops and the Jalie Clara Leggings for the bottoms. Lisbon's set is a little long in the sleeves and in the length but too long is way better than too short and she will definitely enjoy being able to wear them longer. I picked the top sizes based on their chest measurments. (Lisbon was between two sizes so I sized up). I picked the leggings size that are two sizes bigger than their measurements because these are pajamas and I didn't want them to be as snug as workout leggings.


Sew Family Pajamas by replicate then deviate

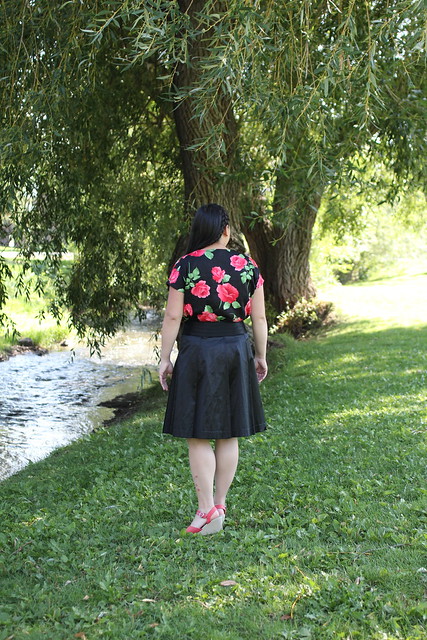
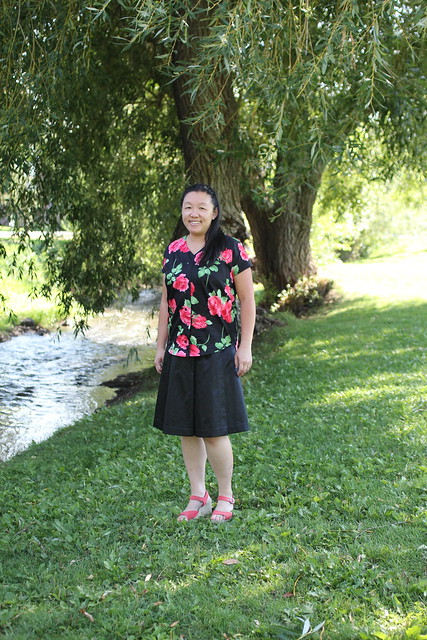
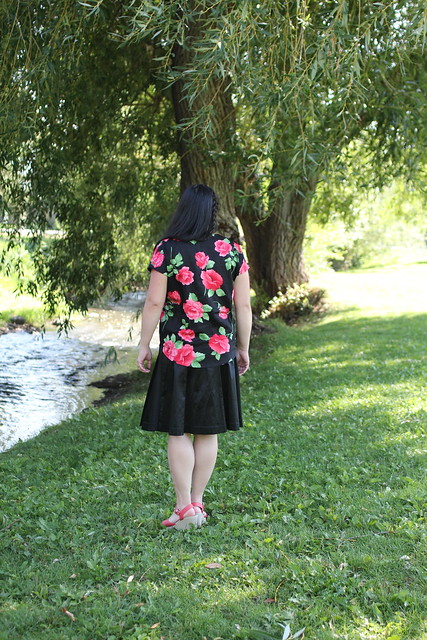
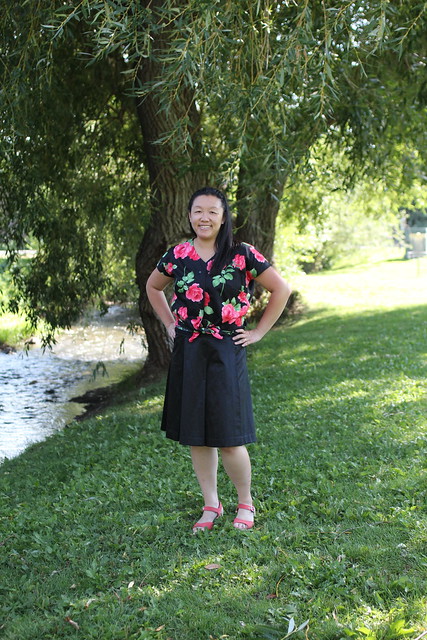
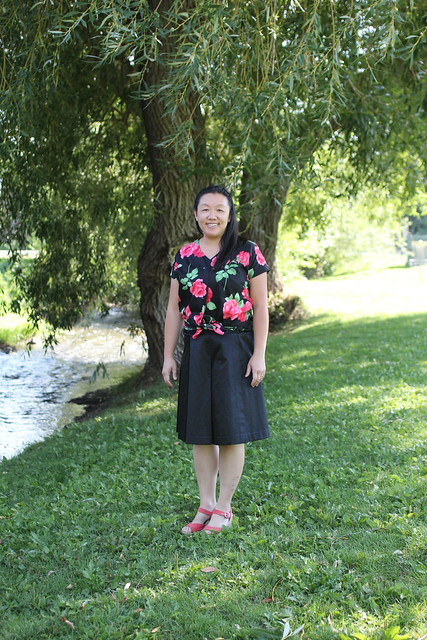
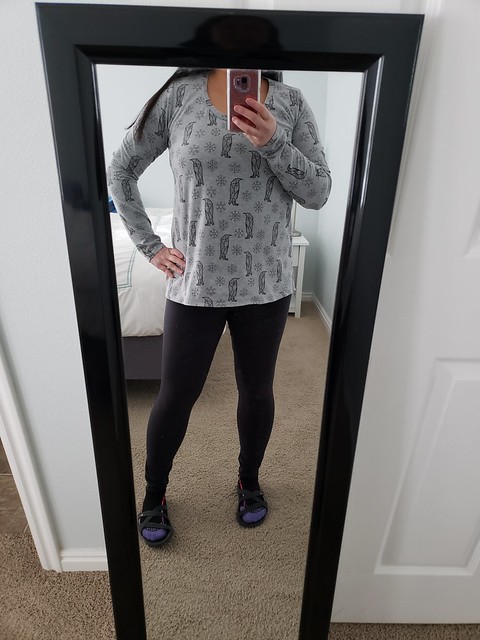
As life goes and we are still approaching the darkest days of the year I was not able to get pics of all of us together, well without pulling them out of school. Haha. But I did manage to get some phone pics of mine so you can see the cuteness. The top is the Hey June Union St Tee and the bottoms are a sized up Jalie Clara Leggings.

sew family jammies by replicatethendeviate

Printing all of our tops and all of our bottoms and sewing all of the penguin fabric took the same amount of time as sewing the black leggings. This isn't a pattern issue since I've made close to ten pairs of the same pattern- it's the fabric. Ugh. I had initially planned to make penguin leggings for myself too but I didn't take into account that the penguins are directional so I didn't have quite enough for leggings for me. Lisbon is totally fine that I now have extra penguin fabric for her. What should I make her?

sew family jammies by replicatethendeviate

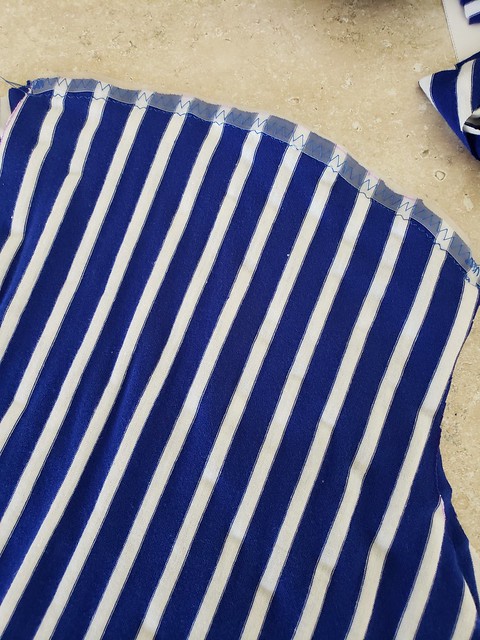
Anyway the black fabric is a double brushed poly athletic fabric I found at Joann. I tried several ball point and stretch needles and the stitching was atrocious on the first pass. And on the second pass. And on the the third pass. You're probably surmised that I didn't hem these! I also omitted the elastic in the waist because I was so grumpy with the fabric. And in all honesty I will probably be wearing these in real life more than as pajama bottoms because they aren't as loose as I'd pictured after seeing the girls' leggings. And because the fabric really is soft and warm and it's my least favorite season.

Sew Family Pajamas by replicate then deviate

Sew Family Pajamas by replicate then deviate

Thank you for stopping by! I hope you're spending time doing things you love and staying healthy during this busy season. If you're looking for pajama inspiration be sure to check out the rest of the tour!

December 2 Teri // Fa Sew La
December 4 Sierra // Seams Like Sierra
December 6 Emily // Replicate then Deviate
December 10 Heidi // Handmade Frenzy
December 11 Sharon // Sweet Mama Life
December 12 Carrie // Beri Bee Designs
December 13 Katie // KatieKortman.com
December 16 Melissa // A HAPPY STITCH
December 17 Taish // Blooming Skies
December 18 Leanne // Thready For It
December 19 Laurie // Make It Sew with The Bear And Pea Atelier
December 20 Brooke // Idle Sunshine
December 21 Marissa // Sew Help Me
December 23 Lara // Handmade by Lara Liz
December 24 Kelly // Petite Stitchery
December 25 Jess // Broad In The Seams
December 26 Victoria // Victoria Beppler
December 27 Heather // Heather Handmade
December 28 Sylvia // The Ravel Out
December 30 Victoria // Victoria Lucille Anne
December 31 Teronia // Sew Haute Blog

Tuesday, September 17, 2019

Itch to Stitch Blog Tour Anza Top

Hi! I'm delighted to participate in the September Spotlight, this year's Itch to Stitch Blog Tour. Thanks to Crystal for her outstanding organization skills and the fun theme! Bloggers were given the opportunity to select an Itch to Stitch pattern to highlight and share. We were encouraged to choose a pattern that could use a little bit of extra attention (anyone else find that your most recent makes are the new favorites?!) or to look at a pattern in a different way.

Kennis, the designer extraordinaire of Itch to Stitch Patterns, has graciously offered a 25% off discount code for all of the patterns highlighted each day. Today's code is 917itsblogtour25. The code will be valid for 24 hours 8am-8am Eastern Time. If a code is used outside the 24 hour period, it will reflect a $0 discount on the order. Today's featured patterns are Busan, Anza, Emily, Jacqueline, Liana, Nottingham, Sequoia, Medellin. Be sure to follow along to see the beautiful makes of the other bloggers on tour: (the sneak peeks I've seen are swoon worthy!)


Here are the Bloggers for the ITS September Spotlight Itch to Stitch Blog Tour

September 16th 
September 17th 
September 18th 
September 19th 
September 20th 


Make sure you enter the sweet giveaways at the bottom of this post!

I chose the Anza Jumpsuit and Dress pattern to highlight. I remember when this pattern was first released and I feel like it was ahead of the jumpsuit/romper popularity. I really loved the design (and the cup sizes!) but hadn't ventured into jumpsuit/romper territory since second and third grade and then got distracted by new patterns. When I was perusing the Itch to Stitch website, I suddenly realized this was exactly what I was looking for/exactly what had been missing in my wardrobe all these years- a button down woven top with a v neck! It turns out I'm not the only one with such a genius idea (check out the #anzajumpsuit and #anzadress and #itchtostitchanza hashtags on instagram or search in the Facebook group) so I'm not claiming originality or anything like that but I am extremely pleased the Anza fills a hole in my wardrobe!

Itch to Stitch Anza by replicate then deviate

I sewed a quick bedsheet muslin of size 10D. The instructions say to use your normal cup size and I wasn't sure if it meant sewing cup size or bra size so I split the difference and sewed a muslin. The fit of my muslin was exactly what I hoped for! I arbitrarily added about 5.5 inches to my muslin and straightened out the side seam near the waist. After sewing the muslin I decided to add a curved hem to the bottom of my final version. I also omitted the cuffs when making my muslin and decided I liked the slim sleeve and that it would be less fussy under layers in the cold seasons. I chose to raise the dot under the arm 1/2 inch since the cuff wouldn't be there and so the bottom of the sleeve fit closer to my arm. In hindsight I probably could've raised it only 1/4 inch but it the sleeve is still very comfortable and doesn't restrict any arm movement. I also chose to omit the chest pockets because I wanted a slimmer silhouette/slightly dressier look. Sewing is the best because we can customize endlessly for our preferences!

My serger is still broken so I used french seams for the shoulders and on the side seams I sewed them with a 1/2 inch seam allowance, pressed them open, and folded and pressed the raw edges towards the center seam then topstitched along each side. I feel like this type of seam finishing has a proper name but it escapes me at the moment. The sewn down facing is my current very favorite way of finishing a neckline! I love how everything stays in place and the facing that stays put! I also made some single fold bias tape from the scraps to finish the curved hem. I chose to use black kam snaps because they matched and were handy from other projects.

Itch to Stitch Anza by replicate then deviate

I used some cotton sateen from the Gertie line at Joanns a few years ago. I had been saving it for the perfect project and I am thrilled with the results! It was easy to sew and press! And it is lovely to wear! I styled my Anza Blouse with a ready to wear wrap skirt from The Limited that is over a decade old. (And maybe the skirt shrunk over the years....) I think I prefer the tucked in look or the knotted look at the bottom. I had my daughters take a few pics of the blouse untucked so you could see the split hem but my oldest said it "looks weird" and I don't disagree. I have worn my Anza Blouse untucked with jeans and it looks better with a bottom that is slimmer through the hips. Which one is your favorite?

Tucked:

Itch to Stitch Anza by replicate then deviate

Itch to Stitch Anza by replicate then deviate

Itch to Stitch Anza by replicate then deviate

Untucked:

Itch to Stitch Anza by replicate then deviate

Itch to Stitch Anza by replicate then deviate

Itch to Stitch Anza by replicate then deviate

Knotted:

Itch to Stitch Anza by replicate then deviate

Itch to Stitch Anza by replicate then deviate

Itch to Stitch Anza by replicate then deviate

How would you style this Anza Blouse?

We have had some generous sponsors for this tour. I have been fortunate enough to have tried fabrics from almost all of our sponsors over the years and have been very pleased!

itchtostitchsponsors


Visit our Sponsors and enter our Rafflecopter Giveaway for a chance to win one of 2 amazing prize packages:

Prize # 1

Itch to Stitch: 3 PDF patterns of choice
Raspberry Creek Fabrics: $100 Store Credit

D&H Fabrics Co: $50 Store Credit

Simply By Ti: Prize of $20 Store Credit
So Sew English Fabrics: Prize of $40 Store Credit

Sly Fox Fabrics: $25 Store Credit


Prize #2

Itch to Stitch: 3 PDF patterns of choice

Beautiful Textiles: $100 Store Credit

D&H Fabrics Co: $50 Store Credit

Surge Fabric Shop: $20 Store Credit

Knitpop: $50 Knitcoin Credit


Rafflecopter begins Monday September 16th and will close at 11:59pm ET Sunday, September 22nd. 2 winners (1 per prize package) will be drawn and announced Monday, September 23rd.
Rafflecopter HTML:
a Rafflecopter giveaway


Rafflecopter LINK:
http://www.rafflecopter.com/rafl/display/6395adad4/?

Thank you for stopping by!


Wednesday, June 26, 2019

The Coffee and Thread Madrid Dress Blog Tour

Coffee and Thread Madrid Dress in Knit by replicate then deviate

Coffee and Thread Madrid Dress in Knit by replicate then deviate

Hi! I'm delighted to share my Madrid Dress by Olga of Coffee and Thread Patterns. I have been so inspired and wowed by the beautiful dresses and blouses already on tour! All Coffee and Thread Patterns are 25% off with the code "madridtour" until Friday, June 28th 2019. Some of our favorite patterns are our Lana Tops (women's, girls') blogged here and the Nina Blouse blogged here and here. Thanks to Olga for the lovely patterns and to Claudia (@frl.love on instagram) for organizing! (And did you see her Madrid dress that she also sewed in knit?!)

So background story- my serger broke last week! I think the upper and lower loopers are out of alignment? They worked fine until I brushed them out with a sewing machine brush and they sewed a few nice chains before completely locking up. I haven't had time to disassemble it and figure out exactly what's going on but I'm hoping I won't break it worse than it is already broken. A service call in my area costs nearly as much as my machine did new(!) so I'm motivated to figure it out when I have time to.

Knowing that the serger was out of commission, I was lamenting having to go back to zigzagging all of the lovely tiers of the Madrid Dress. Zigzagging definitely worked fine but now that I'm used to a serger it's hard to go back! I dutifully sewed up my muslin in a size 14, according to my measurements. My sewing room is in the basement and as I was coming upstairs to press my fabric I remembered a cut of blue and white striped fabric in The Stash. It's been in The Stash for so long I can't remember where it came from or when I got it. It is soft and feels like a rayon spandex and had been asking to be sewn into a dress for years but I didn't have the right pattern until this blog tour! (Most of you probably sew knits on your sergers exclusively so I realize this is a little strange to decide to go all knit but the advantage of not having to finish edges plus my love for the color and not having an invisible zipper with a matching pull on hand were very persuasive). I also was reminiscing about visiting Madrid and wearing this knit faux wrap dress! (presewing days)

Madrid 2008 by replicatethendeviate

I tossed the fabric in the wash to prewash it and pulled out my Lana Top pattern (also in a size 14). Why did I use the Lana Pattern? Because it's drafted for knits and I already knew it fit me well. The Madrid Dress has eight darts for shaping but I didn't want to use them in my knit.
I traced my pattern piece in green and freehanded the cap sleeve, trying to copy Mie (@sewinglikemad) as best as possible. (see how in her highlights!)

Coffee and Thread Madrid Dress in Knit by replicate then deviate

I laid my Madrid muslin (with darts sewn) on top of the Lana bodice and traced it in pink.

Coffee and Thread Madrid Dress in Knit by replicate then deviate

Then I combined the two with purple pencil.

Coffee and Thread Madrid Dress in Knit by replicate then deviate

Same idea with the back (with the cap sleeves and combining the Lana back bodice and the Madrid muslin with darts).

Coffee and Thread Madrid Dress in Knit by replicate then deviate

The other change I made was to add pockets! I had just drafted this pocket piece for a skirt I sewed for myself (and then for Ansley). I held up the pattern piece for Tier 1 from the Madrid Dress to my body and felt the pocket would be best placed like so:

Coffee and Thread Madrid Dress in Knit by replicate then deviate

I was unsure how to add pockets with an invisible zipper but Heidi figured it out and shared on her blog! (which I saw after finishing my dress ;))

Let's talk about this fabric. It's soft and lovely and pretty stretchy. I wanted to play with the stripes on the outside but kind of wanted to stablize (and finish all of the edges of the bodice) so I opted to cut a full lining for the bodice with the stripes horizontal like they are intended to be. I didn't bother to line up stripes on the lining because it's the lining and because I was running out of fabric. I knew I'd be happier if I added clear elastic to the shoulder seams and the waistband but I was surprised how much ease there was in the waistband after trying it on. I did sew a little bit of regular 1/4 inch elastic to the back only but you can't really tell. Haha. I think if I sewed this dress in a more stable fabric like cotton lycra that it would fit closer.

Anyway, here's how I fully lined the bodice.

I sewed the front pieces to the back for the lining and the main.

Coffee and Thread Madrid Dress in Knit by replicate then deviate

Added clear elastic to the shoulder seams on the main bodice.

Coffee and Thread Madrid Dress in Knit by replicate then deviate

Wonder clipped the front (wrap part of the bodice and neckline) and sleeves with main and lining right sides together and sewed. (and I didn't crop out my husband's drink of choice haha).

Coffee and Thread Madrid Dress in Knit by replicate then deviate

Turned right side out and pressed well. (no pic). Opened up the front and back bodices and sewed right sides together (like this post!) (no pic).

Baste the faux wrap and raw edges together.

Coffee and Thread Madrid Dress in Knit by replicate then deviate

Loving the length as basted. I was surprised how heavy the skirt was, as you can see in the pics. (and how cute would it be with a skirt like this one?!)

Coffee and Thread Madrid Dress in Knit by replicate then deviate

Coffee and Thread Madrid Dress in Knit by replicate then deviate

Then add the tiers. :)

You'll notice I only added two tiers due to fabric constraints. And I actually used the selvege instead of hemming. I later sewed on a small snap to keep the wrap closed because the fabric has such nice drape.

Coffee and Thread Madrid Dress in Knit by replicate then deviate

Coffee and Thread Madrid Dress in Knit by replicate then deviate

Coffee and Thread Madrid Dress in Knit by replicate then deviate

I am wanting to sew a cotton lycra or french terry version and/or a cotton lycra bodice with a woven skirt (after resuscitating the serger). Or even a skirt like Emi's!

Thanks for stopping by!!


Monday, May 20, 2019

Jalie 3908 Simone Wide-Leg Shorts and Pants

jalie alice and simone

Hello! This is my third (and final, at least for today) post about the newest collection by Jalie Patterns.

The Simone Wide-Leg Shorts and Pants come in 28 sizes. When I picked the patterns I wanted to preview the working title said they were for women so I planned to make them for myself. In actuality they are also for girls and women and plus sizes! I love how generous Jalie is with their multiple sizes and this pattern looks equally darling on the young and less young. The pattern includes layers so you can print the size(s) you need. There are appropriate notches and marking and I appreciated the instructions on where to include interfacing and to baste the pockets and understitch, which always leads me to a more professional finish.

After I printed the pattern and instructions I got a little nervous when I read about the pleats(!) and that the belt isn't removeable (!) (I've never been big on belt wearing because I'm fluffier around the middle and like to avoid bulk) and the fabric recommendation of lightweight fabrics with a soft hand and nice drape (!) (would this cling to my tummy?!) but it turns out I had no need to be worried!!!! I'm still a little bit in shock whenever I wear these pants (which is pretty much whenever they are clean) that through some wizardry I can pull off pleated, belted and bowed, lightweight pants. A new friend, Lizette (@zettsews on Instagram)in the Jalie Ambassador group posted a picture of her daughter in her Alice V Neck Top and Simone Pants and I loved the faux romper look! I had already sewn up my solid Alice V Neck Top and decided to see if I had enough fabric left over for my Simone Pants. I knew I wouldn't look like her gorgeous daughter with her cute figure but thought it was worth a try.

As you may have guessed I LOVE this look! I got so many compliments on it at my daughter's dance dress rehearsal and preschool pick up. It has the look of a romper (or jumpsuit) but it easier to wear on those days I drink a ridiculous amount of water. ;) It feels like secret pajamas! And maybe that's partly due to this glorious fabric which is either 52% tencel 48% cotton (or vice versa) that began its life as a bedsheet that I have been saving for the perfect project. I did spare some of the set to sew lounge pants for my husband because I don't sew for him very often so I used the good stuff on him.

I cut the full length pants and have been having a partly internal/partly with my husband/occasional polling/brainstorming on instagram/Googling since the Kendrick Overalls about the perfect length for full length pants. Should they skim the floor? Should they always be paired with heels? Is it acceptable to wear them with flip flops? Should they be cropped an inch above the ankle? Should they come to the base of the calf? You get the idea. Anyway, the full length ones definitely looked ridiculous on me with my house slippers. I decided they would be cuter just above my ankle or right above my knees. The longer length won so I would waste less fabric that I'd already cut and that's what felt right after polling the Jalie Ambassadors and my way more fashionable sisters. I have no regrets about this outfit!

jalie alice and simone

jalie alice and simone

jalie alice and simone

jalie alice and simone

jaliepost1

jaliepost2

jaliepost3


Ansley saw my faux romper (because I've been wearing it nonstop) and requested one too. It was easy to say yes because I'd already sewn the patterns and they are available in her size and I owed her a romper from two summers ago. I didn't know it would take me so long to make it happen because May is crazy but I finished her Simone Pants in between our photo session from the previous post and the large rain storm. I used a lightweight chambray with a whale print from The Stash (probably originally from Joann Fabrics). It was really nice to sew after sewing the more slippery tencel and rayon challis and shiny cotton.

I sewed a size O for Ansley and a size W for myself based on our hip measurements (my hips are closer to a size V but since my waist is larger I went with the W). Both of our waists measure larger than our hips so I used the corresponding elastic amounts and it worked well! Ansley's hips are a little smaller but since her fabric is a light color I thought a little extra ease at the hips to help hide undies would be appropriate. She requested hers be around knee length and I think they look cute on her! She decided she's going to wear this on the last day of fifth grade and the first day of sixth grade. I should also mention that I did not need any crotch adjustments like I some times do and no calf adjustments (because the pants are wide legged!)

jaliealiceandsimone5

jaliealiceandsimone2

jaliealiceandsimone3

jalie alice and simone

jalie alice and simone

jaliealiceandsimone6

jaliealiceandsimone9


I picked up a dark denim tencel blend to sew another pair for myself. I am planning to leave off the belt and belt loops so I can wear them with untucked tops and tees but I can't decide if I should sew a full length or slightly cropped (like my grey ones) or knee length ones (like Ansley's). What do you think?

Thanks for stopping by!