(disclaimer- I just barely joined Amazon's affiliate program so if I linked correctly, these are affiliate links. There is no charge to you and I may get a small commission which helps me create and blog more often. Thank you for your support and understanding!)
We recently moved and are missing our friends. It took a while to find our place there but it really feels like moving away from family. One of Ansley's best friends dropped off a letter with some dried flowers in it. Ansley really wanted to find a way to preserve them so we put them in a snack sized zippered bag until we could figure out what to do with them. Her same friend also gave her flowers at her dance recital and we tried to save those too, along with a flower from one of her amazing coaches! I also slightly pestered Tyrone to bring us some bleeding heart flowers from the beautiful plant outside our old front door. Lisbon used to pick them and bring me one every day they were in bloom.
A few Google Image searches later and we found resin charms! I may (obsessively) sew but I'm not really crafty so this was a whole new thing for us! The instructions in the kits/molds/charms were a little vague or missing altogether so I thought it would be helpful to document what worked for us and what didn't.

Safety:
It's highly recommended that you use gloves. Happily I didn't find it very fumy but ventilation is another consideration.
Supplies used:
Clear Epoxy Resin Kit
Resin Casting Molds
4 Set Silicone Casting Molds
Open Bezel Pendants Charms
baby wipes (I had some Target ones on hand)
paper plates (my preferred work surface haha)
paper towels
parchment paper or packing tape
Goo Gone (if using packing tape)
dried flowers
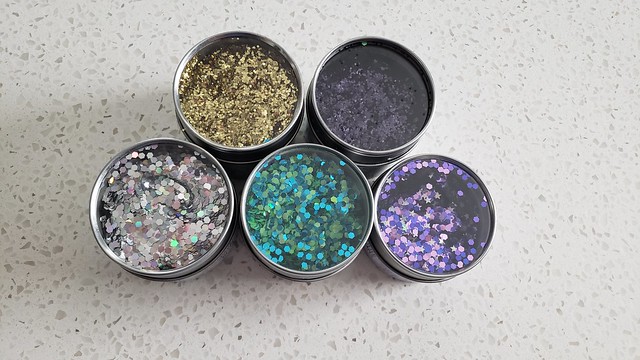
glitter
toothpicks
(these are the glitters I used. They are from Target)
Process for the molds:
1. Wipe all molds with a baby wipe so it is easier to release the finished items. There was one very narrow tube that I was unable to wipe and the resin is still stuck in the mold weeks later.
2. Mix the resin in a 1:1 ratio according to the instructions. (one part resin, one part hardener). The directions with the kit stated to mix for three minutes. It looks mixed enough after about 30 seconds but I made sure to mix thoroughly for the full three minutes. Scrape the sides and bottoms and don't stir too vigorously so there aren't extra bubbles.
3. Fill the molds about 1/3 or 1/2 full. Add glitter or dried flowers. Note- the flowers and glitter may float around a little. The flowers will not be completely submerged. I used a toothpick to gently move items around a little or to pop any tiny bubbles or to encourage the resin to fill the smaller parts of the mold.
4. Let it cure about 24 hours (or overnight at minimum). The kit I used said the cure time is 72 hours but a Google search also said 24 hours.
5. Mix a new batch of resin and resin hardener.
6. Fill to the top and let it cure for 72 hours before removing.
7. Remove and enjoy!
Top row left and top row right show how much the flowers float/drift when the resin is curing. Before I cleaned up for the night I had used a toothpick to gently nudge them into the more centered position I was hoping for.

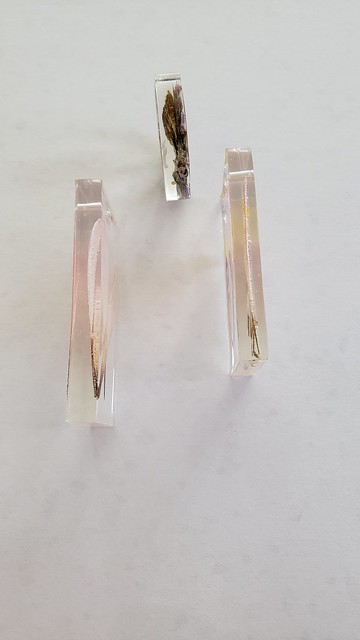
A side view of the petal placed at about 1/3 of the mold filled.

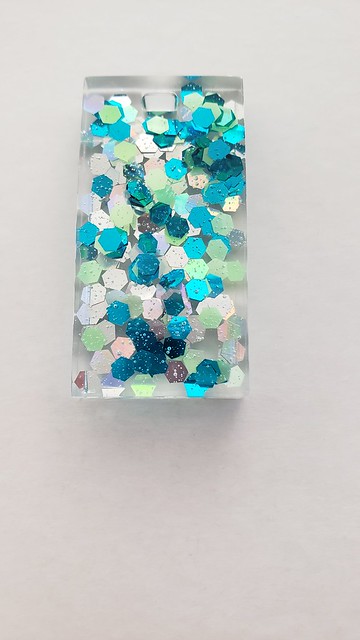
Process for open charms:
1. Place charm on a piece of parchment paper or packing tape (sticky side up). If the charm does not lay flat, prop it up with cardboard so it can lay completely flat.
2. Mix the resin in a 1:1 ratio according to the instructions. (one part resin, one part hardener). The directions with the kit stated to mix for three minutes. It looks mixed enough after about 30 seconds but I made sure to mix thoroughly for the full three minutes. Scrape the sides and bottoms and don't stir too vigorously so there aren't extra bubbles.
3. Fill the bottom of the charm completely, about 1/3 full.
4. Add flowers or glitter OR let it dry overnight. The flowers will not be completely submerged. I used a toothpick to gently move items around a little or to pop any tiny bubbles or to encourage the resin to fill the corners/edges of the charms.
5. Mix a new batch of resin and resin hardener.
6. Add flowers or glitter if you haven't already and fill to the top.
7. Let it cure for 72 hours.
8. Remove from parchment paper (trim the edges of the charm if any resin seeped out if desired) OR remove from the tape. I was afraid to use Goo Gone on the sticky residue because I wasn't sure how the Goo Gone would interact with the resin so I picked my least favorite piece and tried it. The Goo Gone worked well and I haven't noticed any longer term adverse effects. (longer term= a month or so)
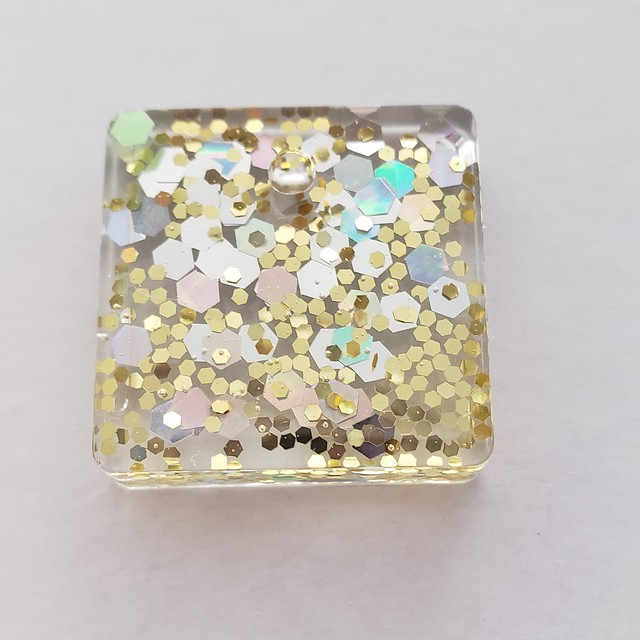
What happened when I wasn't paying attention. I didn't use the toothpick to coax the resin into the top left and top right corners. The next day I thought I could just add a drop (by letting a drop fall from the popsicle stir stick but it was too much!) but didn't spread it out well.

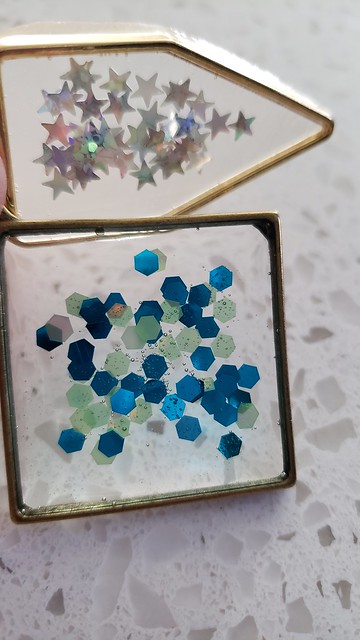
The difference between using parchment paper and packing tape. I found packing tape easier and I like that the results are more transparent. (pentagonal is parchment paper, square is packing tape)

Flower Drying Tips:
The flowers that started it all were already dried, so those were easy to work with. The internet said to place the fresh flowers between pieces of paper or paper towels and press them under a book. Paper towels did not work for us because the texture transferred to the petals themselves. Tyrone used an old insurance card paper and placed the bleeding hearts under his portable toolbox and they dried quickly. The fresh flowers took a few weeks under stacks of piano music and the Harry Potter series and The Keeper of the Lost Cities series. Lisbon also procured a dried flower from her bedroom in perfect condition! She claims it was already dry when I gave it to her (it wasn't) and she placed it in a plastic Easter egg. I don't know if it was sheer luck but it turned out so pretty even though it's a lighter color (some of the whites just turned brown) and it survived a 200 mile move in some box somewhere.
Some of the whites just brown when they dry. Maybe if I had a freeze drier they'd stay more white?
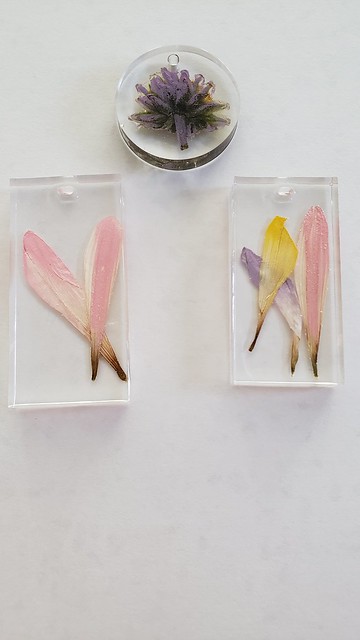
Top right is the flowers from Ansley's dance coach. These were the least brown of them after sitting under stacks of books.
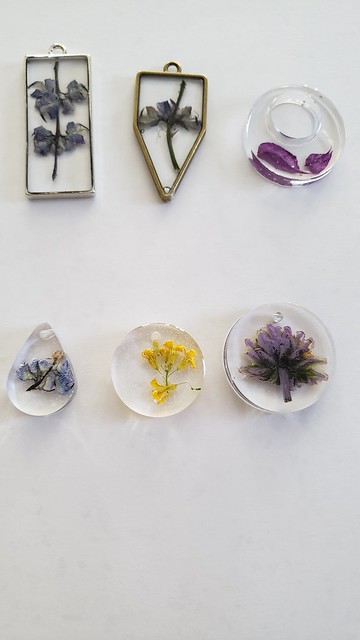
Made with the dried flowers (that were dried when Ansley got them) (you can see some of the drifting in the bottom row I didn't know about until the second round).

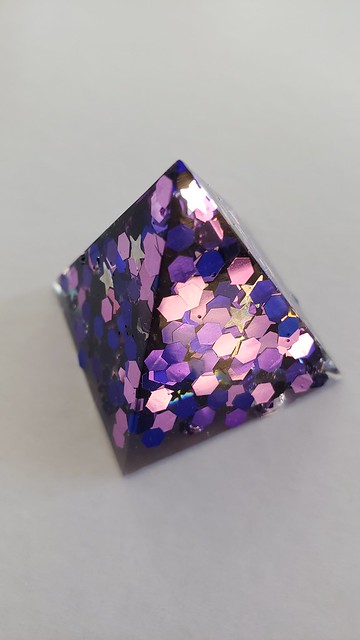
The perfectly 3 dimensionally preserved flower that Lisbon had in a plastic Easter egg. (if you look closely I didn't get enough of the baby wipe in the very apex of the pyramid but it's still one of my favorite pieces.


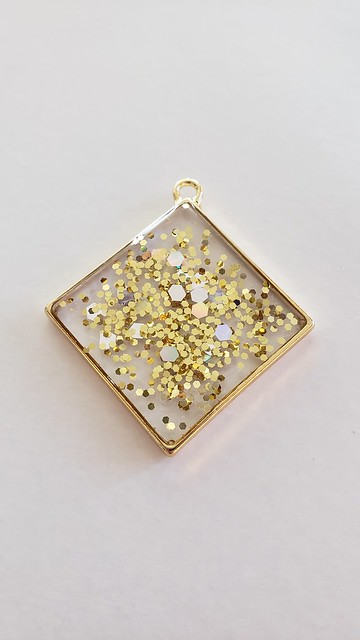
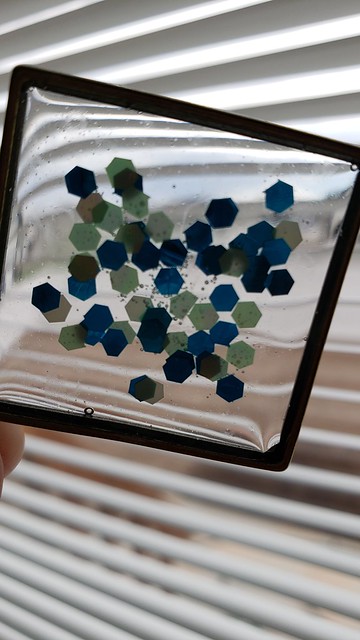
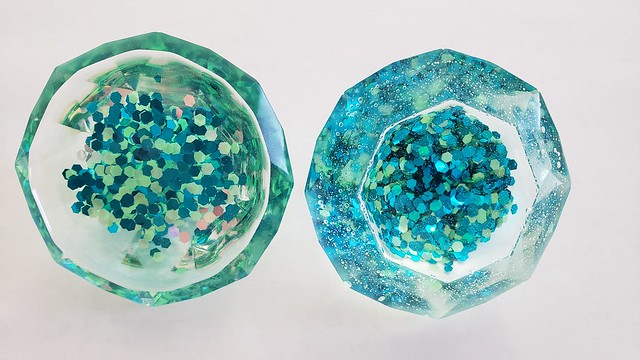
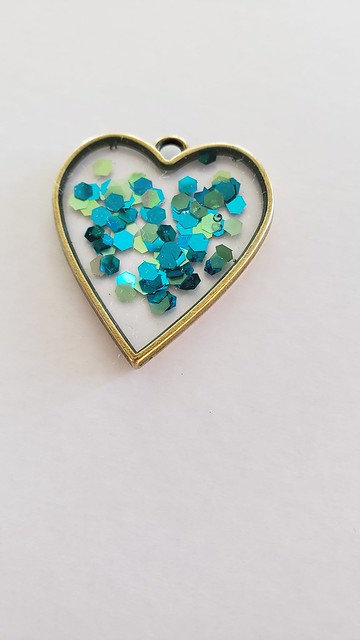
Glitter Tips:
You likely already know that glitter is the gift that keeps on giving. I preferred the chunkier glitter pieces but it was fun to try the fine glitter too. It's pretty difficult to clean every last glittery speck off the silicone molds. I would do the glitter round last next time and make sure to not have my hand over any of the molds/pieces with different colors that I didn't want to use. I like to pour a small amount of glitter onto a piece of paper and pick up the glitter from there (versus directly from the container).
The glitter sinks to the bottom! For the diamond mold I tried the half fill+glitter+curing and a small fill+glitter+curing repeated too many times to remember. I also tried adding glitter to the bottom first in the tiny molds and then pouring the resin and mixing with a toothpick but sometimes that resulted in bubbles at the bottom/loose glitter.
(multi fill on the left, half fill on the right)


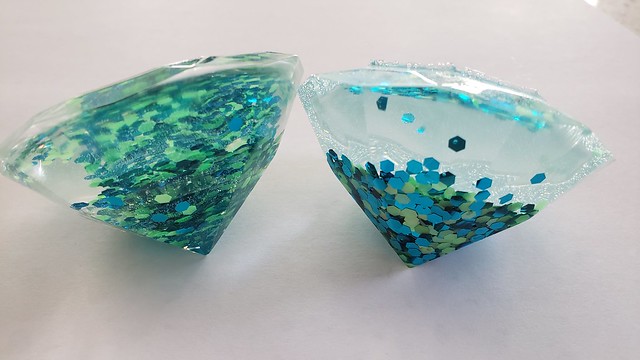

If you zoom in closely you can see a little hole in the center top of the purple heart from placing the glitter in first.

Overall Tips:
The resin+hardener start to harden after about 40ish minutes. I usually plan to be able to pour and use it for about 25 minutes.
I did not find any specific clean up instructions. I ended up wiping out the plastic cup and wiping the stir stick with paper towels and washing my hands for a really long time. I could do more research in this area.
You'll want to be working in an area that isn't dusty/windy so nothing float into your resin as it's drying.
The charms and the molds with the little holes are great for necklaces or hanging in a window or on thin key rings. I picked up some key rings at a Big Box store that were too big so I ended up ordering these on Amazon and they are the perfect width.


Thanks for reading and happy creating!