
I am loving all of the inspiration on the annual Raspberry Creek Fabrics Favorite Things Tour!! Be sure to check out the Raspberry Creek Fabric Facebook page to enter the daily giveaways for fabric (of course!) and the bloggers' favorite notions. You can also check out this week's posts on each blogger's sites:
Made By Kates
Kainara Stitches
I Sew Best After Midnight
Sew Mary Mac
Tessa Does for Love Notions
Sew Love You
All My Spare Time
Pins and Pinot
Crafty Professor
Sew Hard of Hearing
Sew Sophie Lynn
Genwin Design Co.
Shwin Designs
That's Sew Kari
I am so excited about the new custom printing options coming soon! I need to figure out how to tile images because it would be so fun to design fabrics! Through the website you'll be able to pick from a library of past designs and pick which fabric type you'd like the design printed on, which opens up so many possibilities!!!
Every season I crush hard on a print/collection only printed on double brushed poly fabric, which I can't wear because of my sensitive skin. The custom print option allowed me to pick one of the fabrics from the Painterly by Theresa Namenye collection from the Summer 2020 release and use the rayon challis base. It has probably surprised exactly none of you that I picked this colorway! I was a little wary of the rayon challis base because I've tried a handful of rayon challis from other shops and sometimes it has a mind of its own and it grows and is shifty and fussy but some of my sewing friends assured me the Raspberry Creek Fabrics rayon is easier to handle. I'm happy to report that it wasn't the nightmare that other fabrics have been in the past! I did still cradle the fabric like a baby in my arms when switching between the iron and sewing machine and I made sure not to let the fabric hang off the tiny folding table when sewing. There was a little bit of warping in the super long tiers but the drape and gathers covered that up pretty well. I did not feel like I needed to cut the fabric pieces singly (vs on the fold) because the pieces were small enough and the fabric was not too shifty. I didn't experience much fraying at all either, which was super nice when I was spending hours gathering the fabric. I opted to finish the pocket edges the old school way (with a zigzag on my regular sewing machine) because my serger likes to curl the edges of fabrics even after lowering the tension. The best part of this fabric is how it feels to wear!! I may or may not have spent days twirling and frolicing and skipping around my house in this dress. The swish! The twirl! The drape! It feels cool and comfortable to wear; it was nearly 100F when we took these pictures! 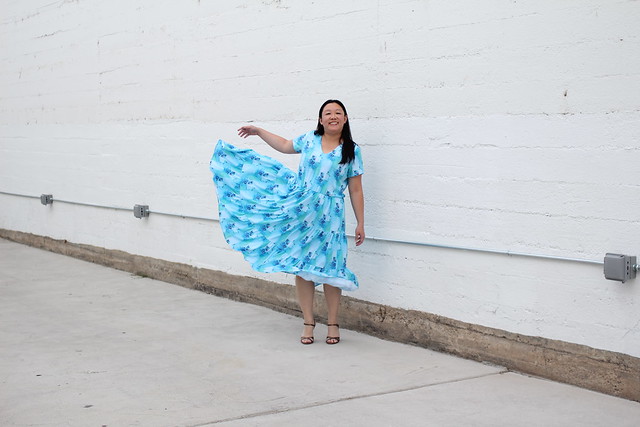

I chose to use the Lucerne Dress hack that Indu shared. Teri also sewed a Lucerne Dress and I read and reread both posts and then made it my own and did what I could to maximize my fabric. [I should've read Adrianna's post too and tapered the sides in but my dress still turned out okay!]
I reprinted the (aff link) Lucerne Blouse pattern (since I'm a different size than I was when I first sewed the blouse). I was between sizes and chose to size up because I was planning a pullover dress (ie no zippers or snaps or buttons or laces etc). I knew I'd be more comfortable raising the v neck so I raised the bottom of the v by about 1.25 inches. I also adjusted the front facing pattern piece to match the less deep v. I cut the fabric at approximate waist level (determined by holding the paper pattern pieces up to my body).
I omitted the ties on the sleeves because I didn't have enough fabric. I also really love the ties in the summer and hot weather but don't love how they feel in the winter when I have to wear a sweater or jacket over them. 

And of course I added pockets! I wanted a pocket piece that anchored in the waist seam so that the pockets wouldn't flap around. I found a free pattern piece by Thread magazine and used the instructions from Seamwork to sew them since I don't own that issue of the magazine. I must've been really tired when I first read the instructions because they made no sense. But going through the steps they worked out beautifully and I will definitely consider pockets like this again!
Finally the tiers and hours of gathering! I used one of my favorite notions, Crayola washable markers, to mark the center of each tier after cutting and side seams for the bottom tier. I love how markers show up on fabric and don't brush off like chalk. They have also improved my accuracy in tracing and lining up notches etc.
I basted the hem (another shortcut since it's far faster to baste the hem vs measuring every few inches while pressing the hem), pressed, and hemmed the bottom tier before assembling the skirt portion. Having the hem done made it feel like the dress was finished faster since hemming is often the last step in the process. I also liked hemming first because the fabric wasn't weighty or falling off my tiny table as much. My tiers ended up being about 10.5 inches in height (with a 3/8 inch seam allowance on the top and bottom) and approximately 1.5 times wider than the previous tier. The second tier is actually just two width of fabric pieces and the bottom tier is three width of fabric strips.
I remembered that Teri slightly curved the sides of her bodice and I did with my fabric also. However when I tried the dress on after attaching the skirt I felt like there was too much ease in the waist. I decided to add some elastic to the waist seam and after three tries I got the tightness just right. I wanted it to gently hug/support the weight of the skirt but not be too tight. I used (affiliate link) this elastic (except 3/8th inch wide instead of 1/4 inch. The 3/8 in is out of stock atm) and it feels wonderful and is the type of elastic I use the most (for necklines, underwear, leos, swim, etc), hence why I bought an entire box of it. I marked the quarters and eighths on my elastic loop itself and I'd already marked the center front and center back of the bodice with washable marker. I used wonder clips to line up the elastic markings and bodice markings, stretching the elastic gently and sewed with a large zigzag.

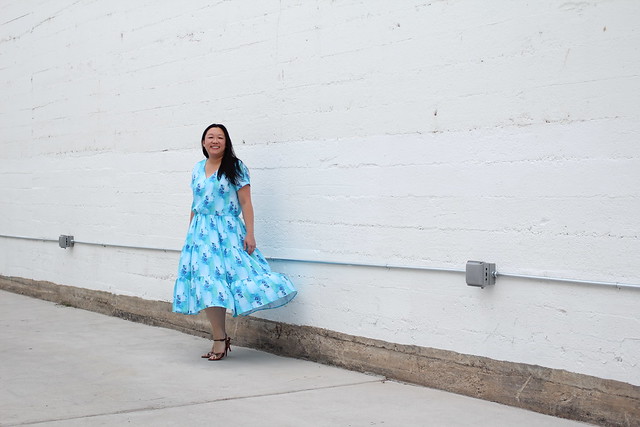
I really love this dress! It's totally my signature style! And while I do need a break from gathering I am already scheming up different renditions!
Thanks for stopping by! Happy sewing!!